How To Take Screenshot On Windows 10 [Quick Guide]
It can be helpful in many ways to be able to snap, save and share what you see on your screen. Screenshots make sharing interesting content extremely convenient, save proof of your online activities, show a complicated process that is not easy to explain in words.
Windows 10 has many integrated options that make it easy for everyone to snap a screenshot. In addition, some third-party applications provide additional functionality and are simple to use.
Here, Today we’re going to show you how to take a screenshot on a PC. A few different methods have been highlighted to give your options a good idea:
1- How To Take Screenshot On Windows 10 With Third-Party Apps
No need to confine yourselves to the Windows 10 applications you have integrated. There are more flexible and powerful third-party tools, perfect for those who have many screen screenshots to take. Third-party apps generally feature other features, like video, annotations, custom keyboard settings, etc.
Here are a few apps from third parties worth examining:
- Snagit (Paid; Free Trial)
- Greenshot (Free)
- Lightshot (Free)
- Screenshot (Paid; Free Trial)
2- How To Print Screen On Windows 10
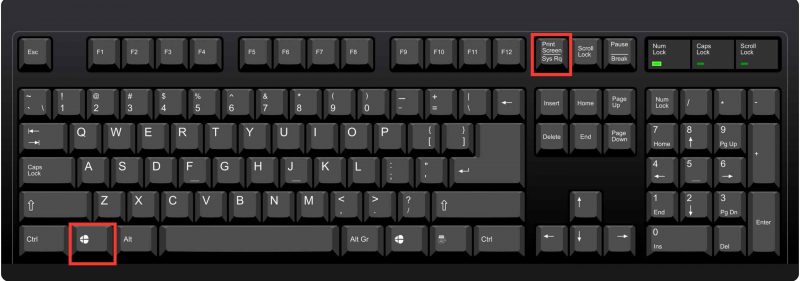
Anyone who wishes to take a quick screenshot should use the Print Screen button. You save and have your screenshot ready for sharing with a number of taps on the keyboard. Print Screen can be labeled as Print Scr, Prt Sc, PrtScn, or a similar version depending on your computer.
How to display on Windows with Print Screen:
1- Press the Windows logo key + Print Screen button to save your screenshot instantly.
2- Press only the Print Screen button to take screenshot without saving it. Next, you can open the file using your favorite image editor or another built-in tool like Paint.
3- Press the Alt key + Print Screen button to capture a screenshot of your active window. You can paste it on an editing tool to save the image.
3- How To Take Screenshot With Windows Snipping Tool
In Windows Vista, the snipping tool first appeared. The app has never seen new features over the years apart from several bug fixes – until Windows 10.
The app’s Delay feature is maybe the most exciting addition, which allows you to snap screenshots of pop-ups and tooltips.
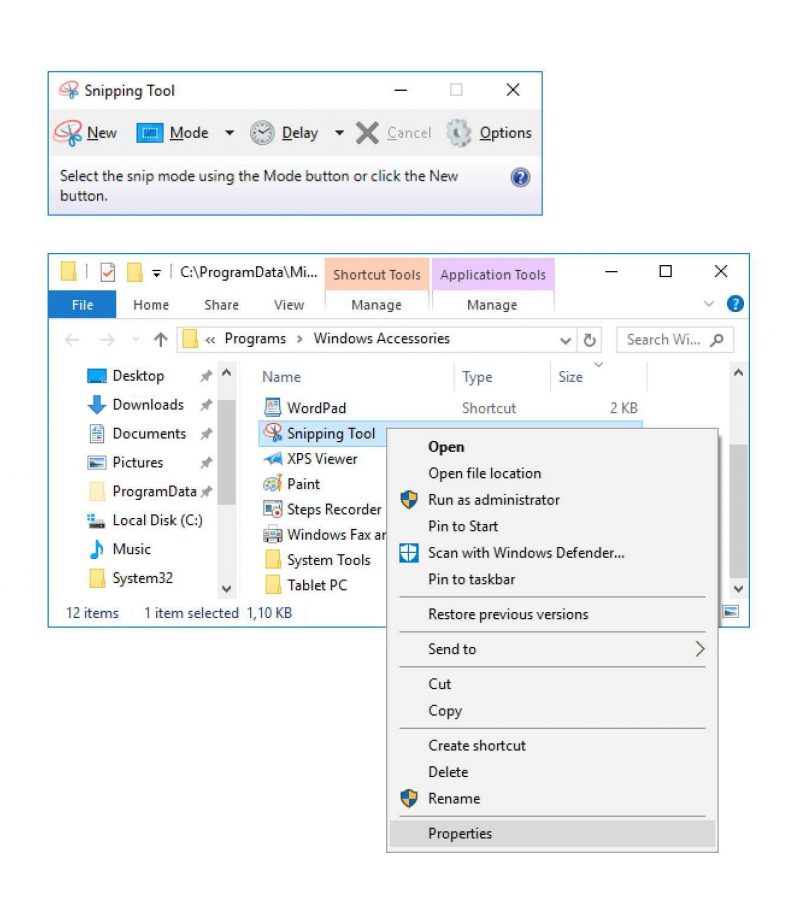
How to take screenshot with the Windows 10 version of your Snipping Tool:
1- Open the Snipping Tool.
2- Click on the Mode drop-down menu.
3- Select your preferred mode: rectangular, freeform, window, or full screen.
4- Click the New button.
5- Edit your screenshot. (Optional)
6- Save your screenshot.
4- How To Take Screenshot On Windows 10 With Snip & Sketch App
Sadly, in some versions of Windows 10 the snipping tool may be discontinued. You can use Snip & Sketch if you do not have such an app installed. The update in October 2018 was first introduced. The new app was specifically designed to replace the sniper. The app can take screenshots in a variety of ways, much like the legacy tool.
Here, How you can take screenshot on Windows 10 Snip & Sketch app:
1- Open the Snip & Sketch app.
2- Click the New button.
3- Choose your preferred screenshot: rectangular, freeform, window, or full screen.
4- Edit your screenshot. (Optional)
5- Save your screenshot.
The Bottom Line:
Windows 10 offers various integrated tools to capture screenshots on your keyboard with a few taps. However, these apps are not the only options you can offer. You can always use third-party programs with other features to snap, save, and share your screenshot as you please.
How To Fix USB Device Not Recognized In Windows 10
When you plug in a USB mouse, keyboard, camera, or other devices, are you getting “USB device not recognized” errors? I’ve got five ports on my computer, and I can’t live without USB ports so that I can put my mouse, keyboard, camera, phone and printer all at once!
You probably have a USB hub connected to one of your USB ports, so you can still link more devices for those of you with even more USB gadgets. It works great most of the time, but sometimes your computer can stop recognizing USB devices. The odd thing about this error is that the ports work only smoothly because I could still load my cell phone easily, but my camera could not be recognized using the same port.
Only one solution worked for me after spending a lot of time and trying several different ways of solving the issue. So first, I will mention this solution, but also the other possible solutions, as the first solution might not solve everyone’s problem.
Method 1: Unplug Computer
So how did I fix the problem at last? Well, it’s a very simple solution if you’re lucky! Try it first, and you have saved a lot of time if it works.
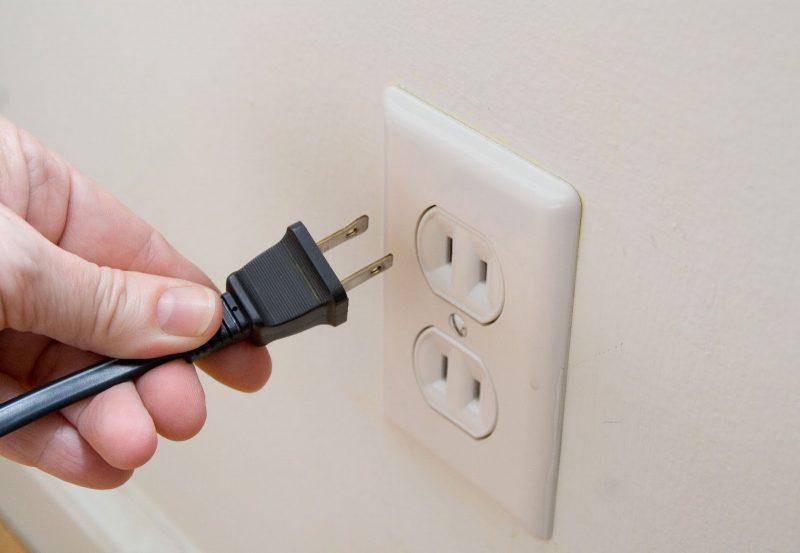
Just unplug the power supply on your computer. That’s it, yes! Yes! Note that this does not only mean that the power button will turn off your computer because most modern computers don’t turn off, and the motherboard still gets power. Also, sometimes it is useful to wake up a computer remotely, etc.
All computer hardware, including USB ports, is connected to the motherboard. The motherboard must sometimes be ‘restart’ because things can go wrong, i.e., suddenly, all or certain USB ports stop working. The small motherboard microprocessor reloads drivers, and hopefully, your USB port recognizes devices again.
Through the shutdown function in Windows or the power button, you can turn off your computer and then UNPLUG the PC from the wall exit. Then, let it sit down for a few minutes and plug it in.
Method 2: Restart & Disconnect USB Devices
You can next try to disconnect all USB devices and restart the machine afterward. Then, finally, try connecting the USB device that caused the problem once you’ve restarted it.
If you don’t recognize that particular USB port, try another one. The hardware issue could arise with one of the USB ports if the device is recognized by another USB port. If no USB port recognizes the device, continue reading because it may be otherwise.
Method 3: Update Device Driver
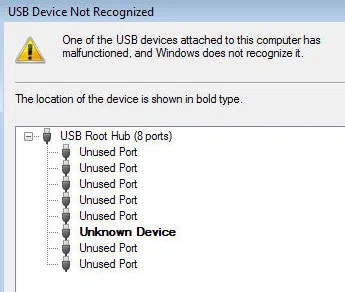
If Windows can’t recognize the device, the device can also appear as “Unknown Device” in the Device Manager. Click Start and tap in devmgmt.msc or go to Control Panel and click Device Manager for Device Manager.
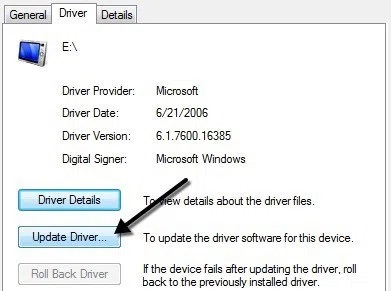
In that instance, click Unknown Device right-click, click Properties, then the Driver tab, and click Update Driver.
You can also try downloading your driver from the website of the manufacturer if it isn’t working. It is probably not a driver problem if the USB device is just a flash drive. However, you may want to download the driver for a particular device if you are installing a USB printer, drawing pad, etc…
Method 4: Connect Directly to PC
Well, A friend of mine ran into the problem, and the cause was his USB hub. Unfortunately, there were only three USB ports on his computer, so he purchased a hub where an additional 8 USB devices could be connected.
I think that proved too much for your computer, and it just sporadically started not to recognize different devices. It worked fine after the hub had been removed and the device connected directly to the computer.
We could not find a solution other than to reduce the number of items connected to the hub. Another solution worked, but it meant a new USB hub with more power was purchased.
You could be lucky if you have this issue with Windows 8 or Windows 8.1. Microsoft released a Windows 8 fix that did not properly detect USB devices. Ensure this hotfix is installed if Windows 8 is running.
Method 5: USB Root Hub
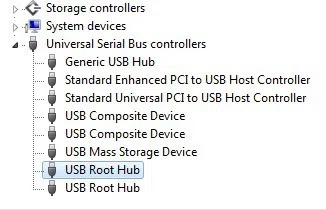
You can also try opening the Device Manager, expanding USB Serial Bus Controller by clicking right on the USB Root Hub and then clicking Properties.
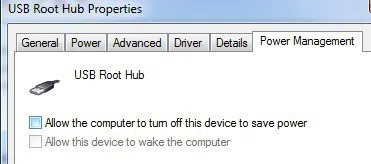
To save power, click the Power Managing tab and check to Allow the computer to disable this device. You must repeat each step if you have more than one USB Root Hub.
To restart your computer:
- Click the OK button.
- Try connecting your USB device again and see whether it is recognized.
- If not, return to each Power Administration tab and check the box again. If the device is recognized, leave it uncontrolled.
Method 6: Update Generic USB Hub
You can also try another thing if you get the Unknown Device error in Device Manager. The device manager opens, and Universal Serial Bus Controllers are expanded.
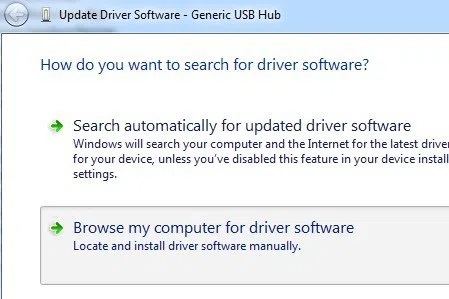
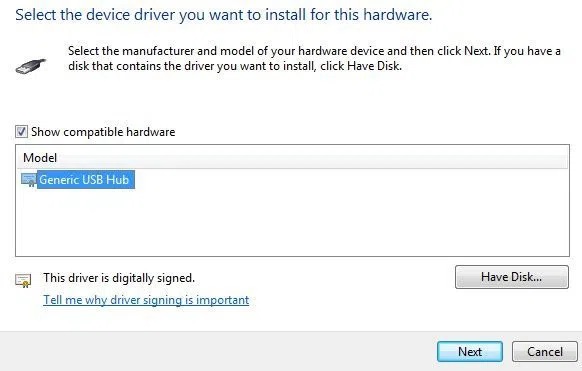
At least one item called the Generic USB Hub should be displayed. You may see two, three or more computers on some computers. Right-click the first and select the software to update your driver.
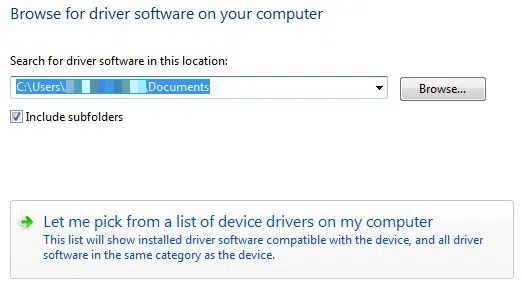
Choose Browse my PC for driver software when the update dialogue pops up.
Click then Let me select from my computer’s list of drivers below.
Choose Generic USB Hub from the list. Normally, nothing other than this choice will be listed. After you have finished installing, click Next and click on Close.
The device manager screen should be updated at this point, and either the unknown device remains there or is recognized now. You can repeat the process for each Generic USB hub listed if it still displays as not recognized.
Method 7: USB Troubleshooter
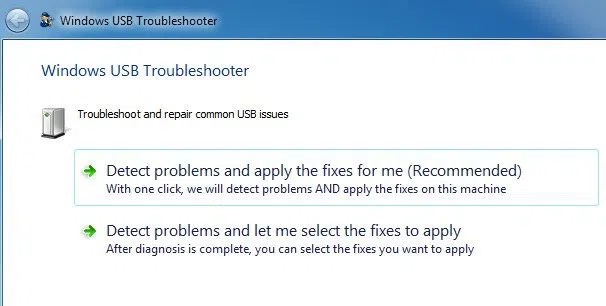
You could download the Windows USB Troubleshooter Fixit tool if nothing has worked up to now. The Windows XP, Vista and 7 free tool works.
You can either fix your problems with the troubleshooter or choose the corrections yourself. I’d just let them work for you because sometimes, the choices for the novice user can be confusing and technical.
Method 8: Uninstall Hidden Devices
Device Manager does not display all devices installed on the system by default. It shows only those connected at the moment. However, if you have installed and no longer use a USB printer before, it is still installed and will not appear in the Device Manager.
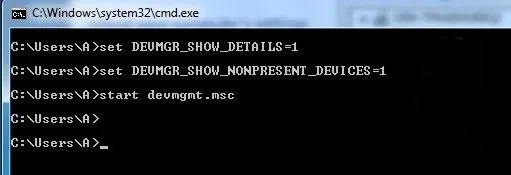
Some hidden USB devices, or ghost ones, may cause conflict with actual USB devices. In Device Manager, you can view hidden devices first by opening a command prompt and then type the following two commands:
set DEVMGR_SHOW_DETAILS=1
set DEVMGR_SHOW_NONPRESENT_DEVICES=1
start devmgmt.msc
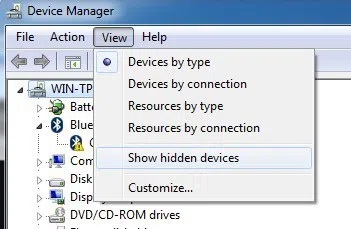
You will have the need to click View and click Show Hidden Devices once the device manager loads.
Now you want to expand the screen, serial controls, and unknown devices. If you see anything in the list that is grey or says that unknown device, click and select Uninstall. Hopefully, it will be possible to remove older devices to work properly with new devices.
Method 9: Uninstall USB Devices
You can also lastly try uninstalling and restarting all USB devices on your system. I mentioned the last because although Windows will automatically recognize the USB controllers, hubs, and devices, it can fail sometimes, and you won’t have any USB ports.
I had a 6 USB ports computer, and it wouldn’t work properly with just one port. In Device Manager, I uninstalled and restarted everything under USB Serial Bus Controllers. I didn’t have a USB port to work instead of re-detecting everything, so be careful when using this procedure.
Start deactivating every item from the serial USB Bus Controller to the Device Manager. Uninstall items with exclamation points or listed as Unknown Device before you begin with anything already working.
Other Possible Solutions To Fix USB Device Not Recognized
If nothing has worked to date, it’s pretty safe to say that the actual hardware may have a problem. The best thing to do is connect the device to another computer and check whether or not it works. If not, the device is a problem.
Solution – 1
If you have one lying around you, the other possible solutions are to try another USB cable. After that, you just have to buy a new cheap USB cable: A to B, A to Micro B, A to Mini B, or A to A. This is a quite rare issue, but I have observed that it has been technical support several times over my many years.
Solution – 2
The other possible solution consists in taking the device, connecting it to another machine, and, if the device is recognized correctly, then ejecting it from the computer properly before reconnecting to the original computer. I have seen the problem with multiple unplugged flash drives without properly ejecting. They suddenly became apparent on the original computer after connecting them to another computer and recognizing them properly from there.
Solution – 3
Some people had the luck of updating the BIOS to eliminate this problem. Whether or not it’s a good idea to update BIOS, I wrote an article already, but it might be worth trying in this case. You can enter the BIOS and disable the USB, restart your computer, and re-activate the USB. You just have a PS2 port on your computer to ensure that, unless you connect via USB, you will be unable to do anything when you disable USB in the BIOS.
Also, Check :
- Screen Mirroring Software for Windows 10
- Install And Run Windows 10 From A USB Drive
- USB Data Recovery Software Free for Windows 10
Hopefully, you will fix your USB Device Not Recognized problem, one of the many solutions above. If not, post a comment, and I’m going to try and assist. Enjoy!
6 Immediate Ways To Fix Microsoft Store Keeps Crashing
Windows Store is the go-to place to find games, applications, software, and whatnot. But, just like any other apps, this otherwise storehouse of applications can act up. For example, So users have reported that they can’t update their games or other applications because their Microsoft Store Keeps Crashing. More concretely, the Microsoft Windows store immediately closes the moment you open it.
Therefore, if you find your Windows Store crashing, needn’t worry! Here are some of the potential fixes that would again take your Windows Store back on track.
Ways To Fix Microsoft Store which Keeps Crashing on Windows 10
1. Clear the Cache Using WSReset.exe
2. Clear Cache Using File Explorer
3. Adjust Date/Time
4. Reinstall Microsoft Store
5. Re-Register Your Microsoft Store Account
6. Update Windows 10
Method .1. Clear the Cache Using WSReset.exe
One of the reasons your Microsoft Store Keeps Crashing could be the accumulation of cache files. This can be resolved very quickly. This entire cache can be cleared with the help of the following steps –
- So, Open the Start Menu by pressing the Windows key.
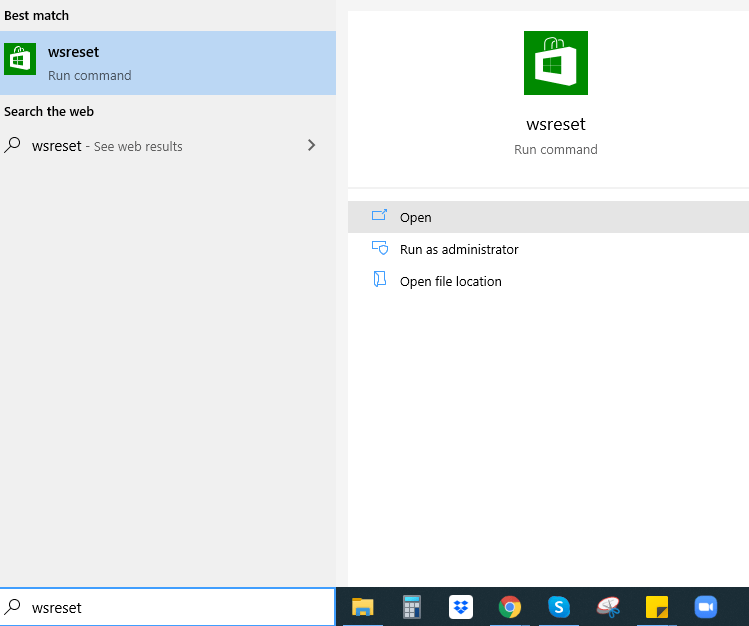
- Now, Type WSReset.exe and click on open
- Next, When the Command Prompt window opens to let it run for a few minutes
After the process, your Microsoft Store should stop crashing as all cache would be cleared. However, if on the contrary, the command prompt hangs and moves on to step no 2.
Method .2 Clear Cache Using File Explorer
- Now, Head to your File Explorer
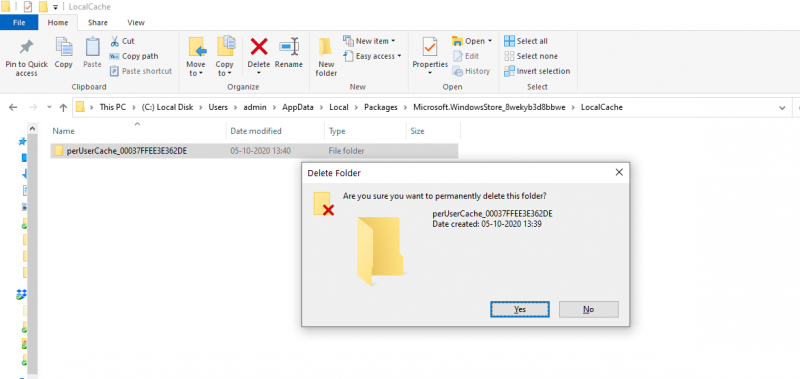
- Here, Type the below-mentioned path in the search bar at the top
C:\Users\admin\AppData\Local\Packages\Microsoft.WindowsStore_8wekyb3d8bbwe\LocalCache
- Press Shift + Delete to completely delete all the contents
Now, try relaunching the Microsoft Store and check if it is still crashing or not. If the Microsoft Store is still hitting, a process to the next step.
Method .3 Adjust Date/ Time
There are several instances when we don’t pay heed to the date and time on our system. But, quite strangely, if you find your Windows Store crashing, it might be the time to adjust the date and time of your Windows 10 PC or laptop. To do that –
- Right-click at the bottom right of the taskbar where you’ll find your existing date and time
- Click on Adjust date/time.
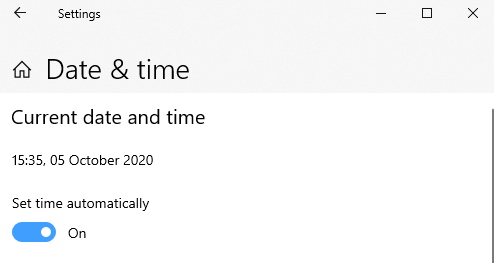
- Check and make sure that Set time automatically is switched on.
This step should also be helpful if your Microsoft Store crashes on launch.
Method .4 Reinstall Microsoft Store
If your Microsoft Store Keeps Crashing on Windows 10, it could be that it is not configured correctly. By resetting and reinstalling Microsoft Store, you will even be able to fix any corrupt files because Windows Store keeps crashing.
- Press Windows key + I and open Settings
- Click on Apps
- Click on Apps & Features
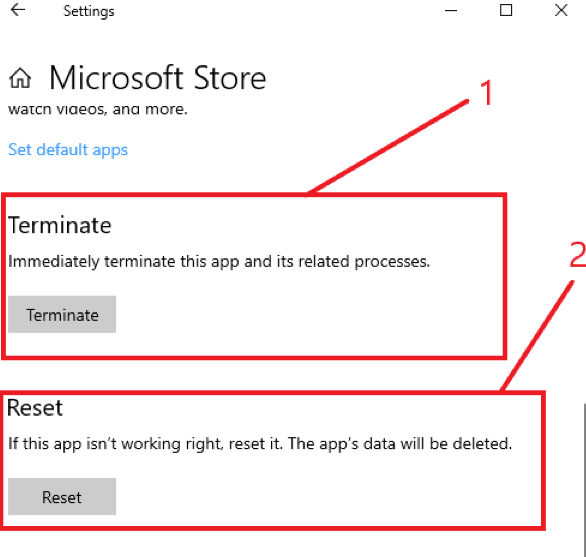
- Scroll down till you see Microsoft Store and then click on Advanced options
- Under Terminate, click on the Terminate button
- Next, click on the Reset button.
This process would first terminate all active Microsoft Store processes, and the reset process will reset the Windows Store application to its default settings. All you have to do now is to access Microsoft Store via Start Menu.
Method .5. Reregister Your Microsoft Store Account
Suppose your Microsoft Store Keeps Crashing on Windows 10, the chances are that there are conflicts between Windows Store & your Windows account. To fix the issue, you can try re-registering your Windows Store.
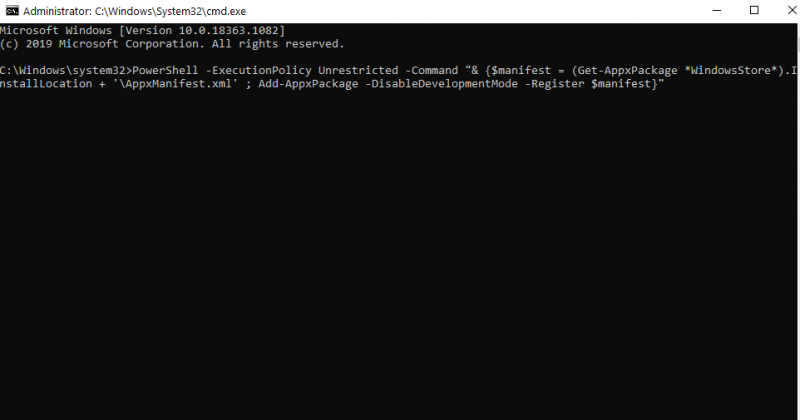
- Open Start & type cmd in the search bar
- Tap on Run as administrator.
- Type the following command
PowerShell -ExecutionPolicy Unrestricted -Command

"& {$manifest = (Get-AppxPackage *WindowsStore*).InstallLocation +

'\AppxManifest.xml' ; Add-AppxPackage -DisableDevelopmentMode -Register

$manifest}"
- Press Enter
Method. 6. Update Windows 10
Even though if, after trying all the above fixes, your Microsoft Store Keeps Crashing still on Windows 10 PC, you can try updating your Windows 10. You are possibly facing the issue because of some bugs that can be patched when you update Windows 10.
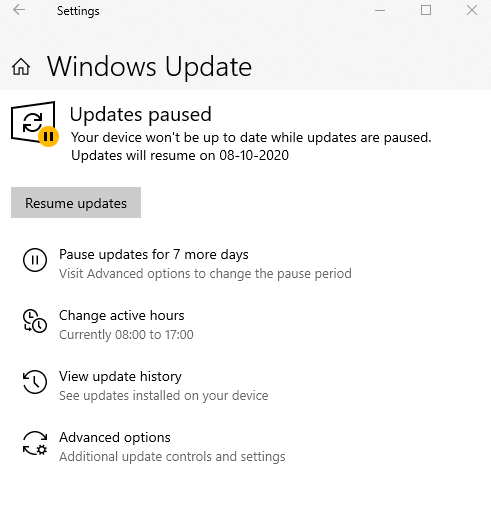
- Press Windows key + I & open Settings
- Click on Update and Security
- Tap on Windows Update
- Check if there are any pending updates & click on Install.
Also, Check :
Conclusion
A smooth-running Microsoft store on Windows 10 is what every Windows 10 yearns for, and we hope that the above workarounds will help you resolve the Windows Store crashing issue. If there is a quicker and more effective workaround, do mention it in the comments section below.

How to Fix the Wi-Fi Connection issue in Windows 10 PC?
Notwithstanding being the smartest Windows ever released by Microsoft, Windows 10 users always keep crashing into various Wi-Fi issues such as Windows 10 updates. So, They have been the topic of constant non-ending debate between the company and users.
Lots of Windows 10 users have faced a frustrating issue with the Internet connection. A lot of have reported not being able to connect to a network, many others have reported not being able to surf the web despite being connected.
Resolving such kinds of Network problems on Windows 10 can be a burdensome task, especially when you don’t have a guide. No Worries. We are here to help. Now, Let’s dig deeper into the issue to know what steps can be taken to resolve it.
Some Steps to Resolve Network Issue on Windows 10
Resolving network issues requires you to, first & foremost, find out the root cause of the issue. This network problem you are facing may result from a fault in your Wi-Fi router, Internet Connection itself, or the Device.
Well, there isn’t any sure-shot way to recognize the root cause of the problem. This trial and error method is the one that fits perfectly in this situation.
1. Starting with the Basics:
So, Before swooping into the more advanced ways to resolve network connection issues, one should consider the necessary steps that may help. Here, From the first instance, these methods may look like a grandma trying to fix a broken toaster by tapping it hard on the back, but they sometimes offer an easy way out.
Step 1- Disconnect your PC from the Network. So, Turn off the Wi-Fi on the Device. Now, turn it back on and connect to the Network to check if you have a working Internet connection now.
Step 2- Restart the Wi-Fi router and connect with your PC to check if you have a working internet connection now.
Step 3- Connect another device with the same network connection to verify if you have a working Internet Connection on that Device.
2. Determining the Cause of the Problem.
Suppose the steps given above don’t work, the user should try to narrow down the list of probable causes of the interruption.
As well, To determine if you have a working Internet connection, try using a ping test.
Step 1- For the ping test, type Command Prompt in the search box on the Taskbar. Here, Right-click the Command Prompt and Run it as Administrator.
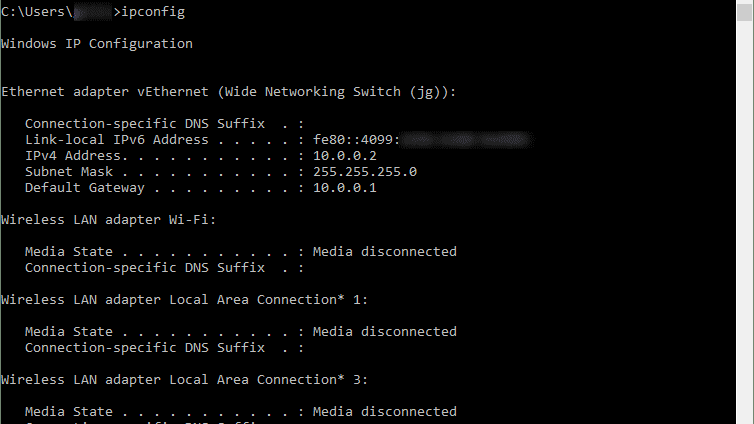
Step 2- Once you have the Command Prompt opens, type command ‘ipconfig’ and press enter. Well, Note the IP address written next to the DEFAULT GATEWAY.
Step 3- Once you have the IP address of your choice’s connection, type the command ‘ping’ with the IP address.
Whether the commands above look something like the screenshot below, you have an excellent working connection with your router.
Note This: Don’t forget to put ‘SPACE’ between ‘Ping’ & IP Address.
3. Network Troubleshooting.
As well, After verifying a valid working connection between the Wi-Fi router and the Device, the user should move forward to Network Troubleshooting steps to establish a network connection. Now, Following the steps is an easy task provided you know the right method.
So, Reset TCP/IP Stack, Release and renew the IP Address, & Flush DNS:
This step includes Multiple actions that may help establish a network connection and resolve the issue. However, These actions require the Command Prompt, which we have used earlier. Hence, Once you have the Command Prompt up, type these commands.
- ‘netsh winsock reset’ & press
- ‘netsh int ip reset’ & press
- ‘ipconfig /release & press
- ‘config /renew & press
- ‘config /flushdns & press
So, Using these Network related commands can help you resolve the Internet issue on your Device.
Here, Uninstalling and Reinstalling the Network Adapter:
In case if the steps given above haven’t worked, we need to shift our focus towards the network adapter and its compatibility with the current version of Windows installed. So, Sometimes, after the Windows 10 update, the network adapter loses compatibility with the updated Windows.
Accordingly, if you have recently updated your system, the network adapter’s incompatibility can be the problem.
To fix this problem, the user needs to uninstall the Network Adapter and restart the pc. So, To uninstall Network Adapter:
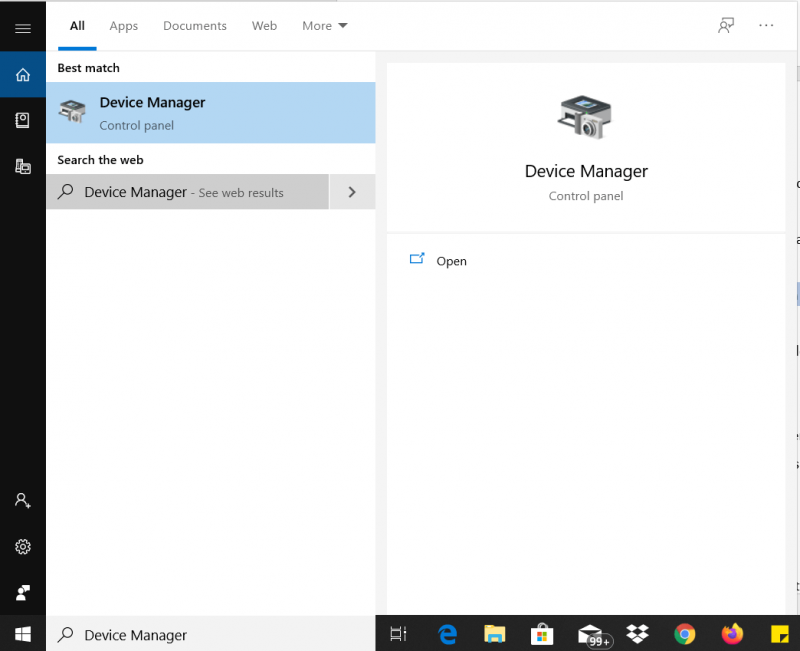
Step 1- Search for Device Manager in the search box on the Taskbar.
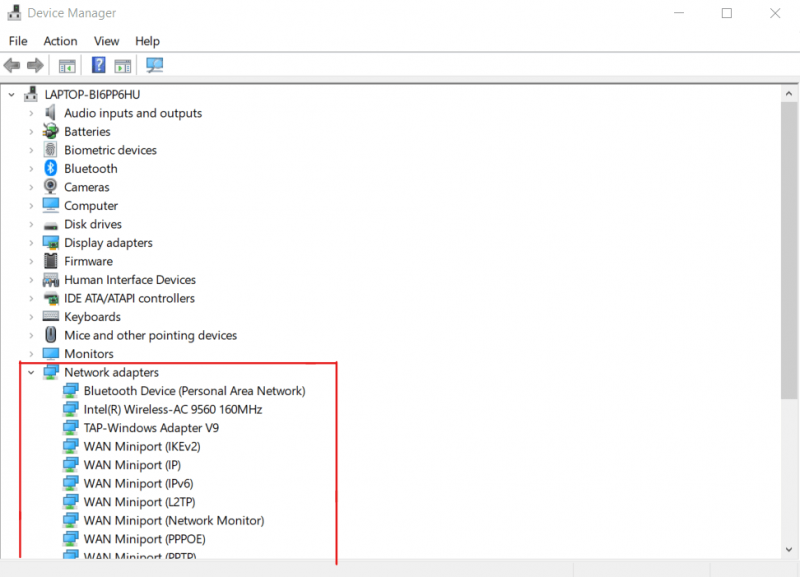
Step 2- Expand the Network Adapters. Now, Locate the Wireless adapter of the Device.
Step 3- Click the Wireless Adapter and Uninstall it.
Step 4- Now, Restart the PC.
Computers are programmed to install the adapters after the restart automatically.
Suppose the problem is with the network Adapter. Well, Chances are, this will resolve the Network Problem on your computer.
Network Reset:
In case if all the techniques mentioned above haven’t been fruitful, the final resort is Network Reset. This clears all the Ethernet data, Wi-Fi connections, and VPN connections that have ever been set up on the computer. This resets all the network-related information, be it wired or wireless. To reset the Network:
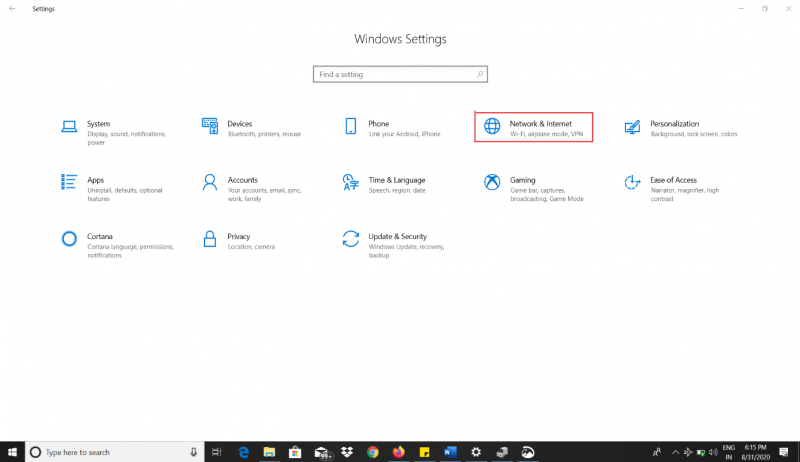
Step 1- Open Settings and Network and Internet.
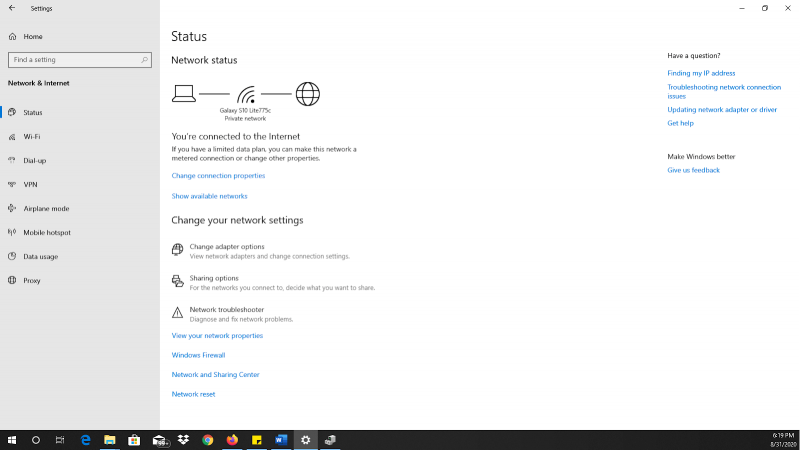
Step 2- You will find Network Reset at the bottom of the page. Of these, you can successfully reset the Network.
Although, there are 90% chances that the steps mentioned above will solve the problem that you may face while trying to connect your Windows 10 device to a connection.
Though there are still cases where you may require real-time technical help to fix specific problems, Thanks for Windows 10, Microsoft has free of cost 24×7 helpline available for any support that customers may need.
4. Use professional IT support
Conclusion :
So, We hope we could help you solve the network problem with your Device or provide you an insight into the steps involved in resolving Network related issues in Windows 10. In case if you have come across other ways to deal with the Network problem on Windows, do let us know.
7 Solutions to Fix WmiPrvSE.exe High CPU Usage in Windows 10
Some Windows Operating system relies on services and processes to run appropriately, though sometimes these processes start causing issues. Plus many users reported one of these processes Wmiprvse.exe is causing a problem for them Well, Wmiprvse.exe is a program that consumes the CPU memory around 30%, and therefore it directly affects the speed of your computer.
This generally happens when a user runs any application, and then the system gets slow automatically. You can verify this issue by opening the task manager and click on the “process” tab. So, Here you will see that (WMI Provider Host) wmiprvse.exe CPU usage is high and is more than 30%.
Attempt to reboot the WMI service in the manner to solve this issue, though this is not a permanent solution to fix the wmiprvse.exe high CPU usage issue.
How to Solved Wmiprvse.exe High CPU Windows PC?
In case if you want tofix this problem, then you have to apply the below-given steps carefully. By using these following steps, you can quickly fix This wmiprvse.exe high CPU usage issue.
Method 1: Reboot Windows Management Instrumentation Service
1: Start, Open the run box by pressing Windows Key + R, in the run box you need to type services.MSc and press the Enter key.
2: Now, from the list, you need to search for the Windows Management Instrumentation Service, after finding this right-click on it & choose Restart.
So, This step will reboot all the services related to WMI services, & it is hoped which High CPU Usage by WmiPrvSE.exe now gets fixed.
Method 2: Reboot all Other Services Related to the WMI
1: Firstly, you have to open the command prompt with admin privilege. Here, To do this, you have to press the Windows Key + X then choose Command Prompt (Admin).
2: So, run the below-given commands one by one, to do this, you have to press the Enter key after each of them which mentioned Below:
- -net stop iphlpsvc
- -net stop wscsvc
- -net stop winmgmt
- -net start winmgmt
- -net start wscsvc
- -net start iphlpsvc
3: Finally, you have to reboot your PC to save all modifications.
Now here check if the wmiprvse.exe issue is resolved or not.
Method 3: Scan and Repair Corrupted System Files
Well, Sometimes due to the corrupted Windows system files, users start encountering wmiprvse.exe high CPU problem. Now, try running the SFC scan to fix this problem.
Follow these steps to do so:
1: First, press the Windows + X, and then select Command Prompt (admin). In case if any UAC appears, then click on the YES.
2: Now, Run the below-given command:
- sfc /scannow
3: Here, After the completion of SFC command, now run the second command given below:
-
- DISM /Online /Cleanup-Image /RestoreHealth
Now, Restart your system and check if the wmiprvse high CPU issue is resolved or not.
Method 4: Run System Maintenance Troubleshooter
1: Start, you have to open the control panel, to do this, press the Windows Key + X and then click on the Control Panel.
2: Here, you have to search for the Troubleshoot and then click on the Troubleshooting.
3: Again, click on the ViewView present in the left pane.
4: Now, Run the Troubleshooter for System Maintenance.
5: This will assist you in getting rid of wmiprvse.exe high CPU Windows 10 issue.
Method 5: Locate the process manually using Event Viewer
1: First, Open the run dialogue box (Press Windows Key + R), in this run box type eventvwr.msc & then press the Enter key to open the Event Viewer.
2: Here, you have to click on the ViewView and then choose Show Analytic and Debug Logs option.
3: Now, From the left pane navigate through Applications and Services Logs > Microsoft > Windows > WMI-Activity
4: So, After opening the WMI-Activity folder (double click on it to expand it) and then select Operationally.
5: As well, At the right window pane choose Error under Operational and in General tab search for the ClientProcessId
6: Now, After getting the Process Id of the particular service that triggering High CPU usage, now we have to disable this specific service to fix this issue.
7: Here, Press the Ctrl + Shift + Esc simultaneously to open the Task Manager.
8: Now, Tab on the Service tab & search for the Process Id which you have noted in the earlier step.
9: Finally, After finding this, go to the Control Panel > Uninstall a Program.
Restart your PC. It is estimated now you can fix wmiprvse.exe issue in Windows 10
Method 6: Stop Certain Services
Most users reported stopping the services related to wmiprvse.exe such as VMWare USB, VMWare USB Arbitration Service, & Hyper-V Virtual Machine Management services fix high CPU usage issue in Windows 10.
Therefore, here follow the steps to disable the services and restart the winmgmt service.
Follow the steps to do so:
- Open the Services window > locate VMWare USB, VMWare USB Arbitration Service, & then Hyper-V Virtual Machine Management services.
- Here, right-click on each of the service > and choose Disable from the menu.
- Well, As all the services are disabled > and restart Windows Management Instrumentation service
Now Here, check if the wmiprvse.exe high CPU Windows 10 issue is fixed or not.
Method 7: Remove Unwanted Applications
Now, Make sure to delete the entire unwanted apps installed on your Computer as this not only eat up the system memory but cause Wmiprvse.exe high CPU usage issue.
These applications like SaveSense, WebSteroids, PremierOpinion and Relevant Knowledge can cause the issue for many users. Thus, make sure to remove these as well as other unwanted applications from your computer.
Plus sometimes manually uninstalling any application won’t remove it altogether some of its traces are left behind. Thus, here it is suggested to use the third party uninstaller to remove application for your PC entirely.
Best And Easy Solution to Fix Wmiprvse.exe High CPU Issue
Hope after following the above-given solution you can fix wmiprvse.exe high CPU, though in case if you are unable to follow the given manual solutions or the problem is not yet fixed, then it’s worth to scan your PC with the Window Repair Tool.
Well, This tool is specially designed to deal with all types of Windows errors and other factors that affect PC performance.
It is also capable of fixing infected registry database, damaged DLL files, corrupt system files, application issues and more.
Conclusion
Well, when all the process consumes CPU memory, then your system performance gets slow. As CPU memory is responsible for running all the activities exist on the Computer
Accordingly, to fix wmiprvse.exe high CPU usage in Windows 10, try the fixes given one by one & check which one works for you. Make sure to follow the fixes given carefully to avoid further issues. It is estimated the article worked for you.

Best USB Data Recovery Software Free for Windows 10
Check out The Best USB Data Recovery Software for Windows. There can be much cause by which you can lose the digital form of your data. This Data can be Professional Files, family Pictures, Project Repositories, and Sometimes Office Documents. No information is less important than the other. So, when such accidents happen on your PC – where you accidentally delete your Files or Folder. But, You want that you can get it back using USB Data Recovery Software. But, for (Undo) The Data There is No (Ctrl+Z) in life.
Today, in this article – I’m going to solve this trouble which you are facing. I’ve picked the Tools for USB Data Recovery Software for Windows 10. They Will help you out in recovering your data from the depth of HDD sectors. Let’s have a look at them Guys.
List Of USB Data Recovery Software Free for Windows
Here’s the list of USB Recovery Software Free that I’ve chosen for you – based on the fame and user reviews. I have also Tested most of them for personal uses. They worked fine. You should also give them a try.
1. Stellar Phoenix
2. SoftPerfect File Recovery
3. PhotoRec
4. TestDisk
5. Recuva
6. Stellar Data Recovery
7. EaseUS Data Recovery Wizard
8. Pandora Recovery
9. Disk Drill
10. Wise Data Recovery
Stellar Phoenix
Stellar Phoenix is a multi-purpose app that can improve your files the fastest way. It’s user-friendly, which makes it best to position your clients. You can Easly recover your deleted files, including any project files, images, documents, etc.
It searches for all data and Folders, so no matter what file extension you have just lost, you might recover it with Stellar Phoenix. The best thing is that it can recover files/Folder from deleted partitions as well. So if you are Harddisk or Pendrive has crashed, and you need to recover data, then Stellar Phoenix is the best way to recover it all back.
SoftPerfect File Recovery
The Soft Perfect File Recovery is an undeleted program on the list. It is easy and simple to use and works from any portable device. You will search the deleted files with their names and Folder and recover them from memory cards, hard drives, Pen drives, etc.
However, it does not support DVDs or CDs. Additionally, the software is a small USB Data Recovery Software of just 500kb and also supports 64-bit versions of Windows.
PhotoRec
PhotoRec USB Data Recovery Software is intentionally made for recovering the lost Pictures of media/Image files from the storage gadget. But, after then, the code for the program seems to be working for all kinds of data. So, this program became famous in quickly recovering the data files from the media. It is mostly the same as the Test Disk Data Recovery Software.
TestDisk
Test disk is a CMD based App– Old fashioned looking tool, which can become so helpful – when you want to extract the dead bodies of your data files from the profound drop of your Storage media. It can be your HDD, USB drives, Memory cards, etc. This App will help you out in all kinds of scenarios. Its best USB Data Recovery Software.
Recuva
Recuva is one of the Best and used Apps by geeks for recovering lost data from the hard disk. This USB Data Recovery Software will improve the same directory tree that you’ve lost on the hard drive. You can do a Full HDD scan, or you can select a partition. The program will work according to the chosen area of the USB or Hard-drive.
Stellar Data Recovery
Steller Data Extracting App will ask the user to Chose the type of media which you want to recover. Getting that info – it only focused its resources only on those lost files of similar models. Thus, making the process more effective and fast. So, if you want to get data fast and quick, this USB Data Recovery Software should be our first choice.
EaseUS Data Recovery Wizard
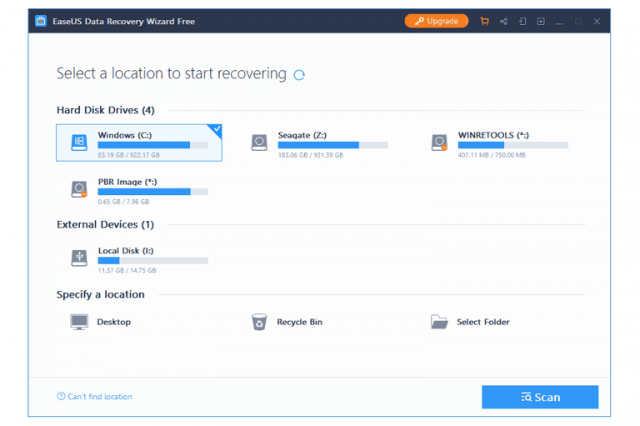
EaseUS Data Recovery Wizard is a high file undelete App. Recovering Data is very simple to do with just some clicks. Even though the software is entirely GUI based and it’s effortless to use. You will select the type of files which you want to search for undelete.
The format is much designed like any windows explorer, which is very simple to use. The remarkable part is that EaseUS USB Data Recovery can recover files from your hard drives, memory cards, optical drives, and even iOS devices. It will also recover data from deleted partitions.
Pandora Recovery
Pandora’s Recovery App will also help you in getting your deleted files back. But, the main feature of this USB Data Recovery Software is that it is well designed for the non-expert user. Any User other than geek can easily use this App. The Color of the recovered files will help the person in understanding the finding depth of the program.
Disk Drill
Disk Drill is a Popular tool for finding your lost data files from any media device. And It comes with an excellent User interface – where you can select and divide the media gadget in any category. Only one click of the button will start all kinds of the procedure and recover the required files.
Wise Data Recovery
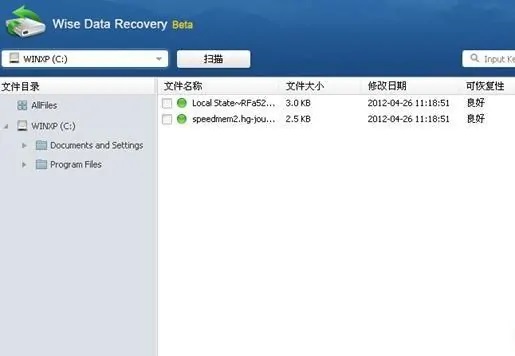
Wise Data Recovery is a free undelete App that is supported in all Windows 10, 8, 7, Vista, and XP. It runs Fast scans for deleted files on Different USB devices. This USB Data Recovery Software is quite simple to use and does fit the work correctly. There are two recourses available both for a Full scan to perform more in-depth scans throughout the device or a quick scan, which makes it much faster.
However, there are few drawbacks, as well as while performing the undelete procedure; the original folder structure is lost. Also, USB Data Recovery Software is not compatible with Linux or Mac.
Conclusion :
Something that has a beginning – also has an end. (except circle) So, now – This is the end of this content on Best Data Recovery Software for Windows. You Can Also Check This Data Recovery Article. If you have any suggestions or doubts – feel free to leave a comment below in the comment field. I will try to help you out with all the possible resources I have.Thanks for your time to Read this Content.

3 Hacks to Resolve Network Related Issues on Windows 10
Have you latterly been facing network connectivity issues on Windows 10 PC?
As well, network issues do not solely depend on a poor Internet connection. Sometimes there may be situations when your Internet is working pretty subtle, and you still might face network issues on your device. Wondering why?
The most significant possible causes for network related issues on Windows may include outdated/corrupt network drivers, probably hardware failure, or error in registry entries, conflicting apps.
Now we are the three most useful yet straightforward hacks that will enable you to deal with identifying and troubleshooting any network-related issues on your Windows 10 PC.
How To Resolve Network Related Issues on Windows 10?
Solution 1: Update Network Adapter Drivers
One of the most well-known reasons you may encounter network related troubles on Windows occurs due to outdated drivers. To update being network adapter device drivers on your Window PC, follow these quick steps:
- Now Right-click on the Start menu and then select “Device Manager.”
- So, In Device Manager, look for “Network Adapters,” click on it to expand options.
Here Under Network Adapters, you will see your installed network driver’s name. So, Right-click on it and now select “Update Driver.”
Solution 2: Run Network Troubleshooter
Although Network Troubleshooter is an in-built Windows feature that scans and also fixes network connectivity issues on Windows. To use the feature, here is what you require to do.
- First, Launch Control Panel, type “Network Troubleshooter” in the search box, and click Enter.
- Click on the “Identify and Repair Network Problems” option.
Now Wait for a few seconds until Windows diagnoses your entire device to identify network-related errors. So, Follow the on-screen instructions and allow the Network Troubleshooter to take care of the job. Using this Network Troubleshooter will help you to narrow down the actual source of the issue so that you can troubleshoot it instantly if in case the problem is more encountered in the future.
Solution 3: Reset DNS Cache
Hence, what are the benefits of resetting DNS cache on your device? Every DNS cache stores all sorts of information related to your browsing activities, including website info. If you reset the DNS cache and flush all the stored data, there are chances that it might fix network connectivity issues that you are facing on your device.
- Additionally, there is no harm in resetting the DNS cache to use this command without having any second thoughts.
- Now, To reset the DNS cache, here is what you need to do:
- Click the Start menu search, type, and launch Command Prompt.
- Inside the Command Prompt shell, type “ipconfig/flushdns” and hit Enter.
- Now Reboot your device and then check whether resetting the DNS cache fixed network issues on your device.
- Here were the three most effective solutions to resolve network connectivity issues on Windows. Furthermore, to make sure that your system never encounters any problems, we have two software references.
Recommend Software for You:
This software recommendations will enable you to resolve network-related troubles without any hassle while keeping your system running in an optimum state:
Smart Driver Care:
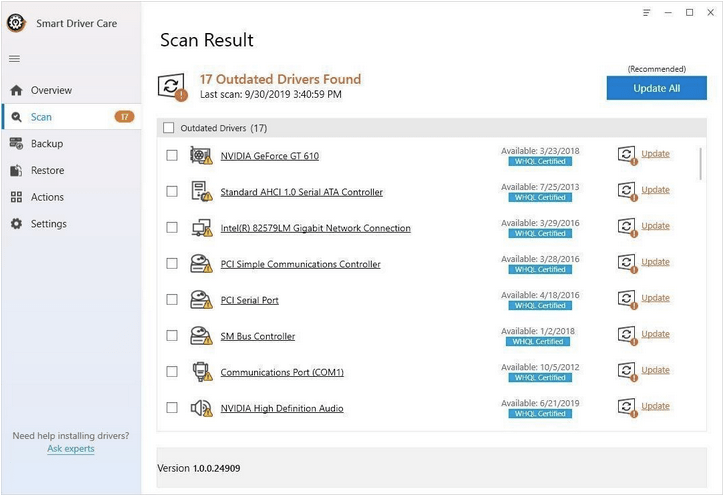
So, Manually updating device drivers is absurdly tiring. Isn’t it? Smart Driver Care can be your protector as it automatically scans your entire Windows system to look for outdated, corrupt device drivers and also update them in just one click. This is surely one of the best driver update software that can take care of all obsolete drivers so that you never have to think about updating drivers anymore manually.
Final Words :
Download this tools to secure your Windows PC stays in a top-notch state while keeping the malicious threats at bay.

Alternatives To Microsoft Paint & Free Similar Software
Microsoft Paint was once the most preferred app for picture editing because of its user-friendly features. Several features like image resizing, cropping, text insertion makes it more valuable. This first version of Microsoft Paint was introduced in 1985 with Windows 1.0.
Although, after an extended period, Microsoft made the much-expected move to stop this application in future Windows 10 updates. Now, you will know about the Best Alternatives to the Microsoft Paint program, which are way more advanced and yet easy to use.
Alternatives To Microsoft Paint And Free Similar Software
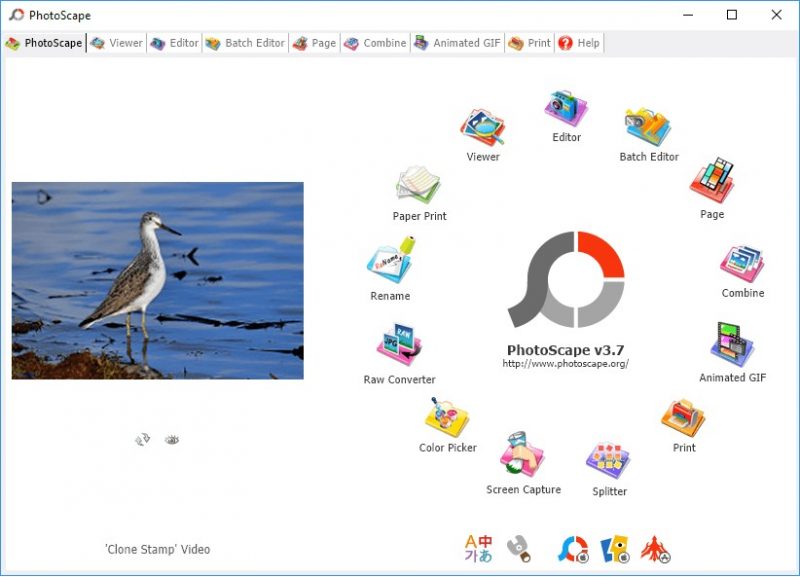
Photoscape
As the name recommends, Photoscape is specially focused on image editing. Photoscape is a perfect replacement for Microsoft Paint online if you use it for different snaps. You will find a separate tool in Photoscape, which is not available in Paint.
As it is mainly concentrated on photo editing, you will mostly find the option of color adjustment. You can also change the white balance, and even you can remove the red-eye effect and convert RAW format images to JPEG format.
Krita
If you are Finding a Microsoft Paint Alternative with some advanced options related to texture artists or illustrators, this is one of the best options. This application is full of tools that are used for visual effects and for picture editing too.
In case you wish to create some painting or drawing, you can easily find different color selections, brush stabilizers, and much more. So, You can consider this tool if you desire to give some visual effects to your image.
Fotor
In this list, you can also try an online photo editing tool that you can access anywhere you want. Yeah, Fotor is one of the online platforms that provide you all features of Microsoft Paint and more advanced features. In case you like to edit any image without installing any other product, give a try to Fotor, you will admire it.
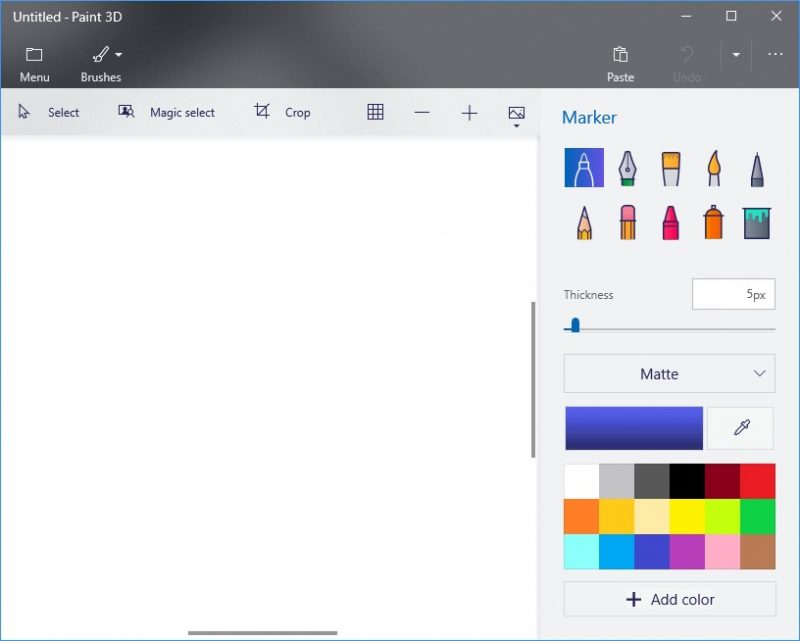
Paint 3D
Microsoft has now introduced a new picture editing tool with Windows 10. This is provided along with previous Paint programs, though, in future updates, Paint will be removed from Windows 10 operating systems. Accordingly, if you are using Windows 10, you can easily find both programs on your PC.
Into actual Paint, 3D is an advanced version of the standard Paint program in which you can now create 3D images and different color effects and also Stickers.
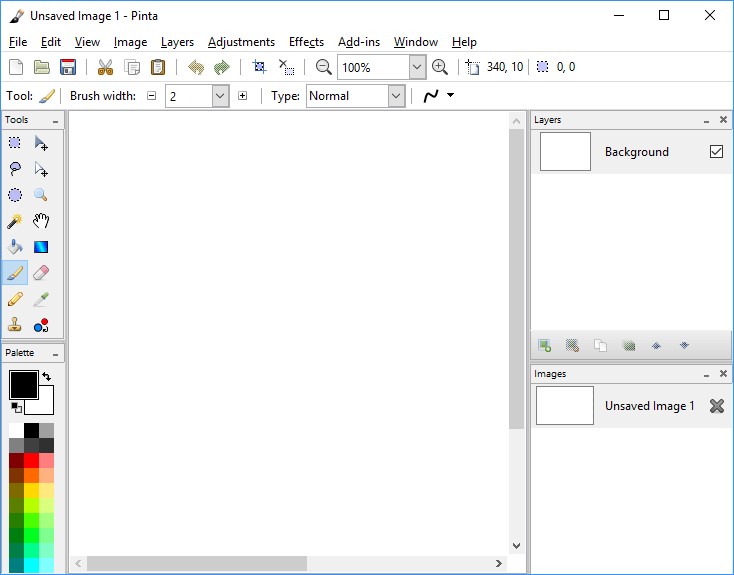
Pinta
Another tool in the list of 5 Best Microsoft Paint Alternatives is Pinta. Similar to other photo editing programs, Pinta is also ranked up here due to its helpful features.
With complete photo editing tools that you get in Microsoft Paint, Pinta comes with some more advanced features like you can pop out the windows on which you are working to make it float as per your preference.
Conclusion :
Change is a law of nature, so as Microsoft is now moving from Paint to Paint 3D, you should further try to look for these Best Free Microsoft Paint Alternatives, which can quickly fulfill your image editing needs.
