
Windows 10 has become one of the best reliable and secure operating systems to date, but it doesn’t mean to be affected by any problems. Now, some users reported that their system restore didn’t complete successfully and left with a System Restore Error 0x80070091. As well, In such a case, you can bring your System back to an earlier point when it was working well. However, this utility doesn’t always work as smoothly as it is required. Sometimes it generates an error like this:
Details:
If System Restore failed while restoring the directory from the restore point.
Source-: AppxStaging
Destination-: %ProgramFiles%\WindowsApps
An unspecified error occurred during System Restore. (0x80070091)
This post will recommend some useful approaches that will help you fix it right now through easy ways below.
System Restore Error 0x80070091
To fix System restore error 0x80070091, use these steps –
1. Rename the Windows Apps folder in Safe Mode
The majority of Windows users reported that after renaming the WindowsApps folder in Safe Mode, they successfully fix this error. Now, Use the below steps to rename the WindowsApps folder –
- First, Boot your Windows 10 PC into Safe Mode.
- Then, Once you’re in Safe Mode, press Windows+X keys.
- Next, select Command Prompt (Admin) to open the elevated command prompt.
- Now, Type these below commands and tap Enter to execute them one by one:
Commands:
- cd C:\Program Files
- attrib WindowsApps -h
- takeown /f WindowsApps /r /d Y
- rename WindowsApps WindowsApps.old
- icacls WindowsApps /grant “%USERDOMAIN%\%USERNAME%”:(F) /t
Suppose the above commands run successfully, then restart your computer & proceed to run the System Restore.
2. Rename the Windows Apps folder from WinRE
Whether renaming the WindowsApps folder in Safe Mode doesn’t fix the problem, try renaming the WindowsApps folder from the Windows Recovery Environment. This procedure is as follows:
- Firstly, Right-click on Start and select Settings from the WinX menu.
- Then, In the Settings window, go to Update & Security > Recovery.
- Next, Under the Advanced startup section, click on the Restart button.
- Now, After your computer restart, go to Troubleshoot > Advanced options > Command Prompt.
- Here, type in your administrator password to continue.
- Then, type the following commands and tap Enter to run them one by one:
Commands :
- cd C:\Program Files
- attrib WindowsApps -h
- rename WindowsApps WindowsAppsOld
Now, After running the above commands, restart your computer & then run System Restore.
3. Perform a CHKDSK scan
As well, Sometimes corrupted or damaged system files can cause to occur such types of problems on your computer. Therefore, you can run the disk checking tool to fix this issue. The procedure is as follows:
- Click on Start & type “Command Prompt.”
- Right-click on Command Prompt & select Run as administrator.
- If the UAC window prompts, tap Yes to permit the access.
- Then, In this command prompt window, type the below command & tap the enter key –
chkdsk /f C:
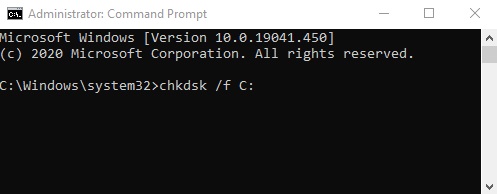
- In the above command, make sure to replace C with your System drive. Now press the Enter key to run this command.
- Suppose you’re asked to schedule a disk scan at the next reboot, type Y and hit Enter to confirm. It will takes 20 minutes to complete the scanning process.
Check These :
Once it finishes the process, then restart your computer & check if the problem still appears or not.