Notwithstanding being the smartest Windows ever released by Microsoft, Windows 10 users always keep crashing into various Wi-Fi issues such as Windows 10 updates. So, They have been the topic of constant non-ending debate between the company and users.
Lots of Windows 10 users have faced a frustrating issue with the Internet connection. A lot of have reported not being able to connect to a network, many others have reported not being able to surf the web despite being connected.
Resolving such kinds of Network problems on Windows 10 can be a burdensome task, especially when you don’t have a guide. No Worries. We are here to help. Now, Let’s dig deeper into the issue to know what steps can be taken to resolve it.
Some Steps to Resolve Network Issue on Windows 10
Resolving network issues requires you to, first & foremost, find out the root cause of the issue. This network problem you are facing may result from a fault in your Wi-Fi router, Internet Connection itself, or the Device.
Well, there isn’t any sure-shot way to recognize the root cause of the problem. This trial and error method is the one that fits perfectly in this situation.
1. Starting with the Basics:
So, Before swooping into the more advanced ways to resolve network connection issues, one should consider the necessary steps that may help. Here, From the first instance, these methods may look like a grandma trying to fix a broken toaster by tapping it hard on the back, but they sometimes offer an easy way out.
Step 1- Disconnect your PC from the Network. So, Turn off the Wi-Fi on the Device. Now, turn it back on and connect to the Network to check if you have a working Internet connection now.
Step 2- Restart the Wi-Fi router and connect with your PC to check if you have a working internet connection now.
Step 3- Connect another device with the same network connection to verify if you have a working Internet Connection on that Device.
2. Determining the Cause of the Problem.
Suppose the steps given above don’t work, the user should try to narrow down the list of probable causes of the interruption.
As well, To determine if you have a working Internet connection, try using a ping test.
Step 1- For the ping test, type Command Prompt in the search box on the Taskbar. Here, Right-click the Command Prompt and Run it as Administrator.
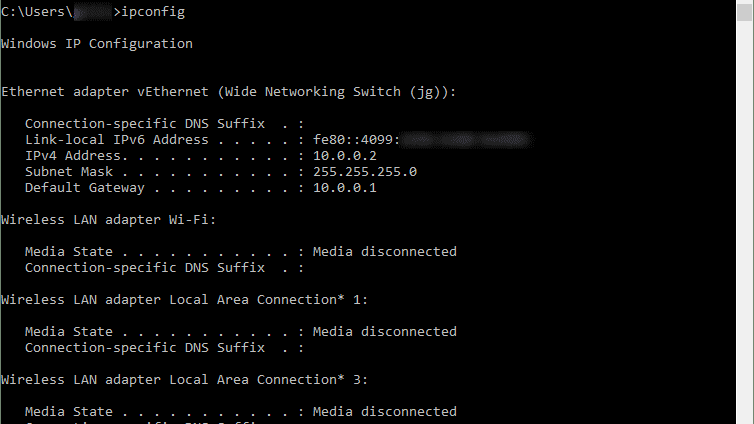
Step 2- Once you have the Command Prompt opens, type command ‘ipconfig’ and press enter. Well, Note the IP address written next to the DEFAULT GATEWAY.
Step 3- Once you have the IP address of your choice’s connection, type the command ‘ping’ with the IP address.
Whether the commands above look something like the screenshot below, you have an excellent working connection with your router.
Note This: Don’t forget to put ‘SPACE’ between ‘Ping’ & IP Address.
3. Network Troubleshooting.
As well, After verifying a valid working connection between the Wi-Fi router and the Device, the user should move forward to Network Troubleshooting steps to establish a network connection. Now, Following the steps is an easy task provided you know the right method.
So, Reset TCP/IP Stack, Release and renew the IP Address, & Flush DNS:
This step includes Multiple actions that may help establish a network connection and resolve the issue. However, These actions require the Command Prompt, which we have used earlier. Hence, Once you have the Command Prompt up, type these commands.
- ‘netsh winsock reset’ & press
- ‘netsh int ip reset’ & press
- ‘ipconfig /release & press
- ‘config /renew & press
- ‘config /flushdns & press
So, Using these Network related commands can help you resolve the Internet issue on your Device.
Here, Uninstalling and Reinstalling the Network Adapter:
In case if the steps given above haven’t worked, we need to shift our focus towards the network adapter and its compatibility with the current version of Windows installed. So, Sometimes, after the Windows 10 update, the network adapter loses compatibility with the updated Windows.
Accordingly, if you have recently updated your system, the network adapter’s incompatibility can be the problem.
To fix this problem, the user needs to uninstall the Network Adapter and restart the pc. So, To uninstall Network Adapter:
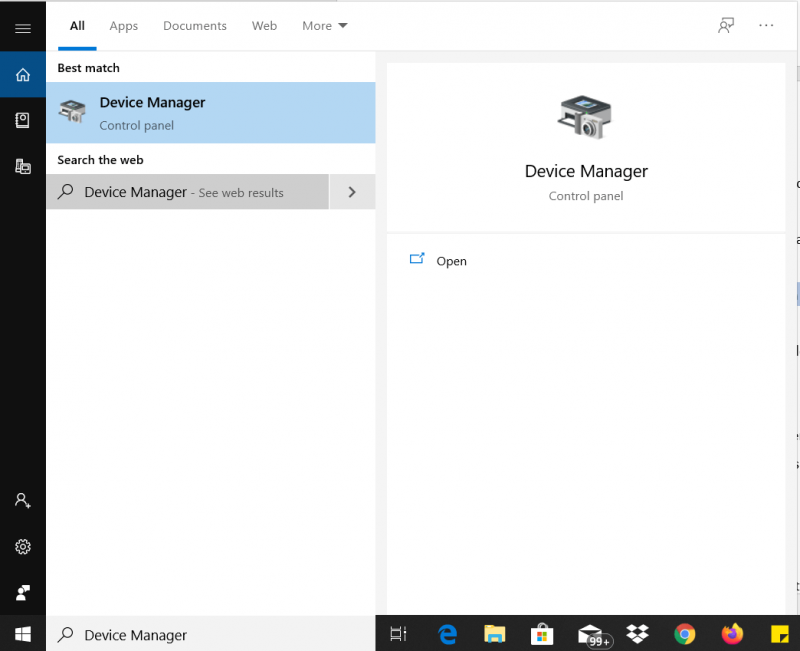
Step 1- Search for Device Manager in the search box on the Taskbar.
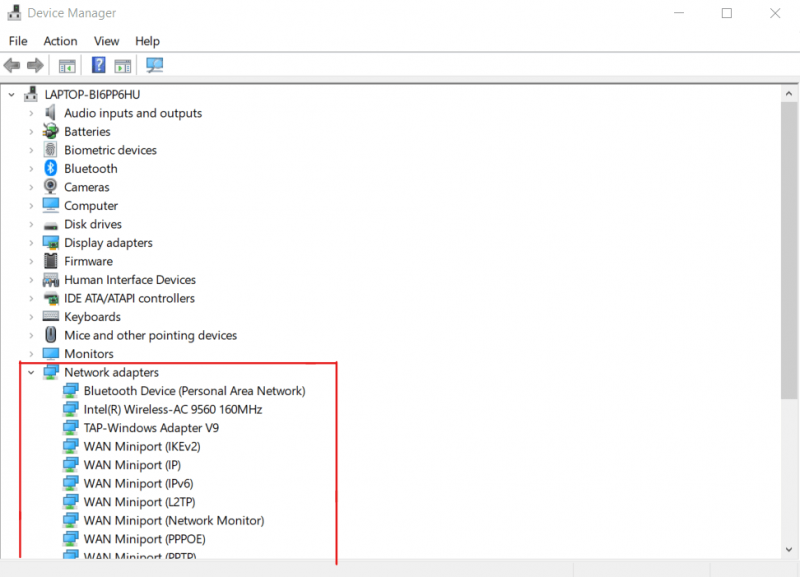
Step 2- Expand the Network Adapters. Now, Locate the Wireless adapter of the Device.
Step 3- Click the Wireless Adapter and Uninstall it.
Step 4- Now, Restart the PC.
Computers are programmed to install the adapters after the restart automatically.
Suppose the problem is with the network Adapter. Well, Chances are, this will resolve the Network Problem on your computer.
Network Reset:
In case if all the techniques mentioned above haven’t been fruitful, the final resort is Network Reset. This clears all the Ethernet data, Wi-Fi connections, and VPN connections that have ever been set up on the computer. This resets all the network-related information, be it wired or wireless. To reset the Network:
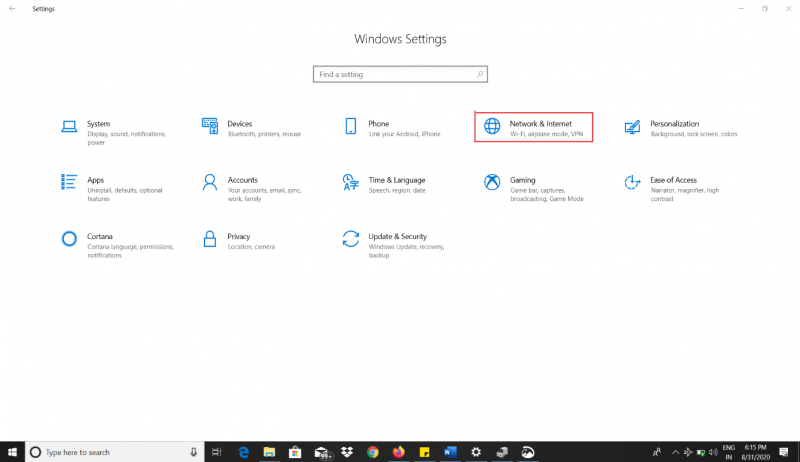
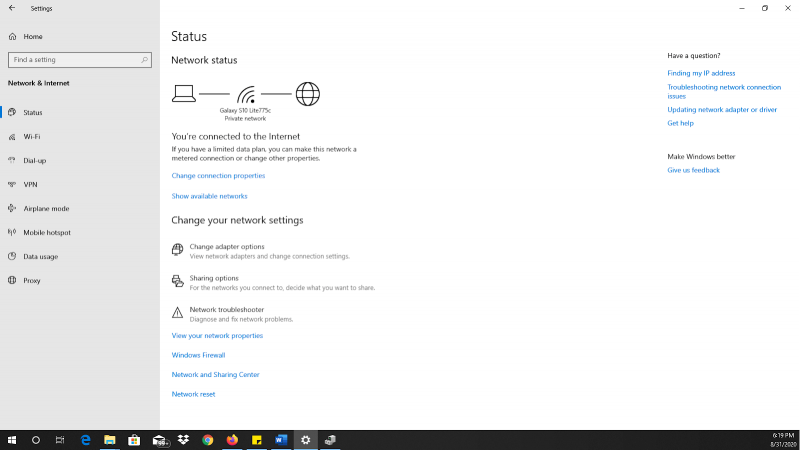
Step 1- Open Settings and Network and Internet.
Step 2- You will find Network Reset at the bottom of the page. Of these, you can successfully reset the Network.
Although, there are 90% chances that the steps mentioned above will solve the problem that you may face while trying to connect your Windows 10 device to a connection.
Though there are still cases where you may require real-time technical help to fix specific problems, Thanks for Windows 10, Microsoft has free of cost 24×7 helpline available for any support that customers may need.
4. Use professional IT support
Conclusion :
So, We hope we could help you solve the network problem with your Device or provide you an insight into the steps involved in resolving Network related issues in Windows 10. In case if you have come across other ways to deal with the Network problem on Windows, do let us know.



Add Comment