
How To Fix Error Code 0x800f0988 In Windows 10 [Full Guide]
Well, Have you recently encountered error code 0x800f0988 while updating your Windows 10 PC? If yes, then you are in the right place. You can find the right solution for error 0x800f0988 on Windows 10 through our troubleshooting guide. Five simple but productive solutions are outlined in this article to address the same problem. This error restricts the installation of any updates that may be available.
But first, let’s get a brief understanding of the error code 0x800f0988 before moving towards the various solutions and fixes.
What Is The Error Code 0x800f0988?
Earlier, in February 2020, the KB4532693 update for Windows 10 was published by Microsoft to correct the problem in the Start menu and Search File Explorer. Unfortunately, the update made it very difficult for users to install the update and prevents them from doing so.
There are reports of error code 0x800f0988, which can affect your device’s overall performance, including wireless Internet connectivity, startup issues, and also cause BSOD issues. You can use our step-by-step manual to resolve the problems associated with Windows on your device.
Simple Solution – How To Fix Error Code 0x800f0988 On Windows 10 PC?
If you have had a Windows update error for a long time, refer to our workaround to solve all the problems associated with Windows Update.
Solution no.1: Clean WinSxS Folder
Cleaning up the WinSxS junk folder can also help you solve error code 0x800f0988 problems. Use the Image Service and Management Deployment (DISM) to support the project. Here’s how the following is:
- First, Press Windows + S key to launch the Search window on your device.
- Next, type ‘cmd’ to open the Command prompt.
- Then, Right-click on it to launch the context menu. Select “Run As Administrator” here.
- Here, click on the Yes button on the UAC prompt window to authenticate your actions.
- Then, in the newly displayed windows, type “dism /online /cleanup-image /startcomponentcleanup” and press the Enter key.
- Now, Let the process complete.
- Lastly, Restart your PC and check if you can install the update now.
Solution no.2: Run Windows Update TroubleShooter
This provides an easy way to solve different errors associated with Windows update. Follow the steps below to fix files that have been corrupted.
- First, Click on the Start Menu and then open the Settings app.
- Next, select the Update & Security tab.
- Then, select the Troubleshoot option from the left-pane of your window.
- Here, scroll through the right pane and locate the Windows Update option.
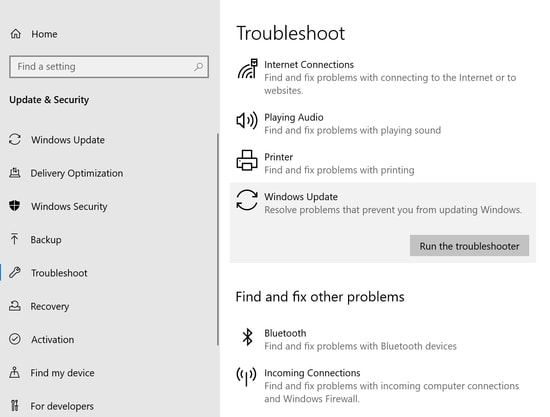
- Click on the ‘Run the troubleshooter’ option.
- Wait until the process completes.
Finally, restart and check that there is still an error code. If so, then proceed to our third solution.
Solution no.3: Reset Windows Update Component
This also allows you to download updates seamlessly. Let’s see how it works. How does it work.
- First, Open Task Manager on your PC by right-clicking on the Taskbar.
- Next, from the Task Manager window, choose the File menu followed by the ‘Run New Task’ option.
- Here, Type cmd to create a new task. You can refer to the ‘Create this task with administrator privilege box for the same.’
- Now, In the next page, type the below-mentioned commands:
-
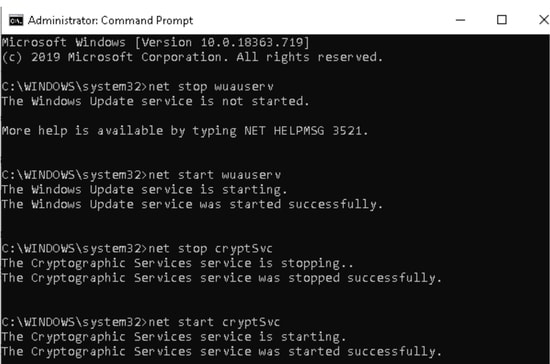
- -> net stop wuauserv
- -> net stop cryptSvc
- -> net stop bits
- -> net stop msiserver
After each command has been typed, enter. This will deactivate several background services.
- Now, The next step is to rename the catroot2 and SoftwareDistribution folder. For this, enter the below-mentioned commands:
-
- -> ren C:WindowsSystem32catroot2 Catroot2.old
- -> ren C:WindowsSoftwareDistribution SoftwareDistribution.old
- Then, restart the services that you disabled earlier. Then, Use the below-mentioned commands for this, and remember to click Enter after each command.
-
- -> net start wuauserv
- -> net start bits
- -> net start cryptSvc
- -> net start msiserver
- Here, Wait for the process to complete. Next, restart your device and try installing the pending Windows 10 updates again.
Also, You can try resetting your Windows 10 PC when none of the above solutions worked for you. How can you do it, here’s how.
Solution no.4: Remove Additional Languages
It has also become apparent that it has also been possible to remove additional languages in many cases. So take the simple steps below to fix your Windows 10 PC error 0x800f0988.
- First, Launch the Windows Settings app on your computer by pressing the Windows + I key.
- Then, select the Time & Language option and then choose the Language tab from the left pane.
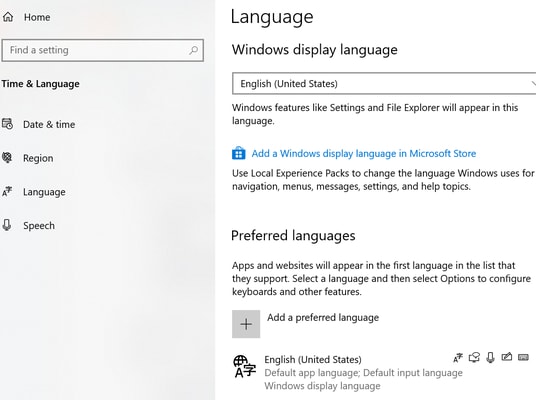
- Next, refer to the right-pane and select English (United States) from the Preferred Languages section.
- Then, Remove the other default languages by clicking on the remove button adjacent to them.
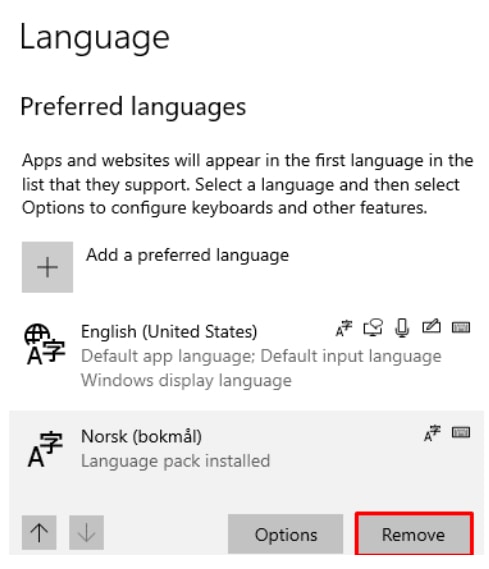
- Here, Save the changes and then restart your device.
Now attempt to install Windows updates and see if the problem is fixed; if not, go to our next method to learn more about fixing the 0x800f0988 error code.
Solution no.5: Reset Windows 10 To Resolve Error 0x800f0988
This is another helpful way to fix Windows 10 error 0x800f0988.
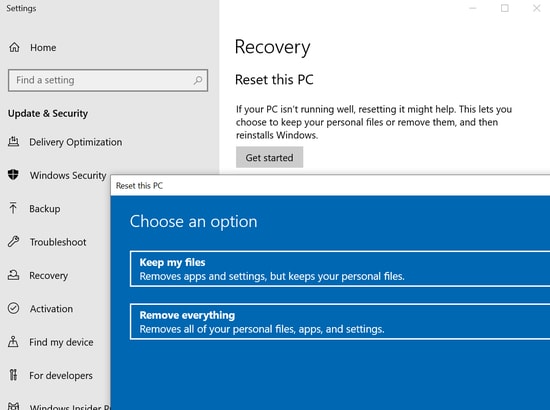
- First, From the Start Menu, click on the ‘Reset this PC’ button.
- Next, from the right panel, click on the Recovery tab followed by the ‘Get started’ button.
- Here, In the newly displayed window, click on the ‘Keep my files’ option and then hit the Next button.
- Here, press Reset.
- Lastly, restart your device to apply the changes and try installing the updates on your system.
Also, Check :
- Find WiFi Password On Your Android Device
- Fix USB Device Not Recognized In Windows 10
- Remove Password From PDF Files
Fixed: Error Code 0x800f0988 On Windows 10 PC
So, how can you easily and rapidly fix Windows 10 error code 0x800f0988? The above workarounds will solve 0x800f0988 error problems. But, first, try to see what is the best way to do it.
We hope that these methods will easily and uncomfortably update your Windows computer. And what method did you use? Then, in the comment box below, tell us so that our readers can easily detect the most effective method to resolve the same problem.
How To Speed Up Google Chrome on Window 10
In this article, we explain you How To Speed Up Google Chrome on Window 10. The browser of your PC is no less important than the operating system installed on it. As it is, your browser supports you to connect with the World Wide Web. But if that browser becomes slow, then it can ruin your whole browsing experience. Now when it gets to the choice of browsers, Google Chrome is considered as 1 of the fastest and secure browsers. But not everyone will concur with that, and the reason for this is that there are several consumers who feel that Chrome starts slowing down with time.
But believe me, fellows, if you feel that your browser Chrome is slowing, then you can simply speed it up with the methods provided in the article. Furthermore, all the steps that we have discussed in the article can be performed even by a novice user. Therefore without further ado, let’s learn how to speed up Google Chrome.
Methods to Speed up Google Chrome :
Check Your Internet Speed
Before we get begun with the tips to speed up Google Chrome, 1st make sure that your internet connection is up and running. Because if it’s your Internet connection that is the offender, then none of the below steps can help you much. Therefore 1st run a speed test and check your Internet speed. If there is no issue with the Internet connection, then you need to do some tweaks to make chrome run faster.
Update Your Chrome Browser
The really basic step that you need to support to speed up Google Chrome is to keep it updated. Yes, if you are utilizing an outdated version of Google Chrome, then it will be slow to respond. Plus, since Google keeps on rolling new updates from time to time to improve the functionality and security, there is no point in ignoring these updates.
To update Google Chrome, follow the actions below:
1. Launch Google Chrome and tap on the menu icon (3 dots) located at the top right corner of the browser screen.
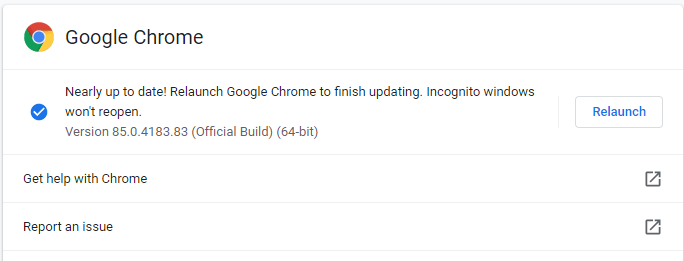
2. Now, from the drop-down menu, choose Help > About Google Chrome.
3. Chrome will automatically review for updates and will install them.
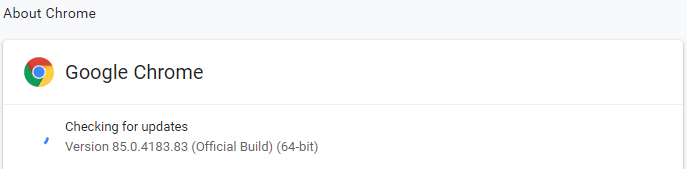
4. Tap on the Relaunch button to let Chrome finish the updates.
Turn on Prediction Service in Chrome
Chrome possesses an inbuilt prediction service that fetches information from the sites you have visited, along with the ones you have not visited. This overall benefits in minimizing the page load time. If the trait is not already enabled, then enable it by following the actions below:
1. Launch Google Chrome and tap on the menu icon (3 dots) located at the top right corner of the browser screen.
2. Now, from the drop-down menu picked Settings.
3. From the left-pane in the menu bar, tap on Privacy and security. And in the right pane, tap on the option, Cookies, and other site data.
4. Now scroll down till you locate the option, Preload pages for faster searching and browsing. Toggle the button subsequent to it to On position.

As this setting is once allowed, it pre-fetches the info from already visited webpages you will surely feel a change in the speed of your Chrome browser.
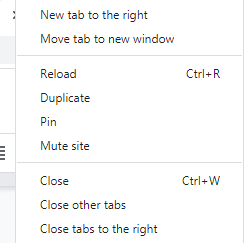
Close Unneeded Browser Tabs
This is a smart tip to speed up Google Chrome. If you’ve multiple tabs open, then each of them will consume some amount of resources. Therefore if you are feeling that the browser is slowing down, then as a 1st resort, close all the tabs that are currently not required. For instance, if you have 20 open tabs and presently you are working on just 4, then close the rest 16 tabs. You will see that now your browser is more responsive and fast.
Uninstall Unneeded Chrome extensions
Many Chrome consumers have a tendency to install various extensions thinking that will enhance their browsing experience. Nevertheless, instead of getting an enhanced browsing experience, they all get a slow browsing experience. Yeah, as every active extension uses a small part of system resources, and if you have installed a lot, then collectively, they use a lot of memory resulting in slowing down of Chrome.
Therefore our next tip to speedup Chrome is uninstalling all unneeded Chrome Extensions by following the actions below:
1. Launch Google Chrome and tap on the menu icon (three dots) located at the top right corner of the browser screen.
2. Now, from the drop-down menu, choose More tools > Extensions.
3. Now see out for all the extensions that are no longer needed, and both disable them by turning off the toggle button or completely remove them by tapping on the Remove button.
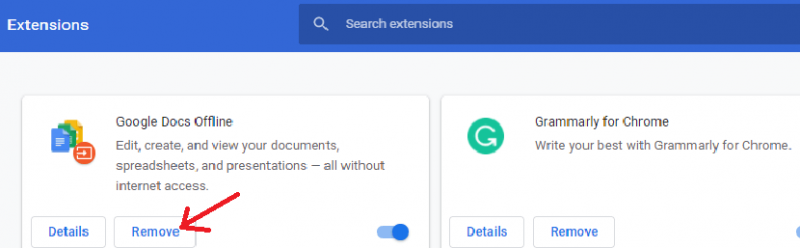
4. Repeat the same method to remove all the unwanted extensions.
After removing the Chrome extensions, you will definitely notice a difference in the speed of your browser.
Update Network Driver of Your Computer
Another most obvious reason that is slowing down the performance of Chrome is an old or missing driver. And once you refresh that network driver, you can speed up Google Chrome.
Updating the drivers was a dull task since there were no driver update tools possible, and you were bound to update the drivers manually. However, now, with various available driver updater tools updating a driver is simply a click away.
Nevertheless, if you are a tech savvy guy and have enough computer skills, then you can still update the drivers manually by visiting the device manufacturer site > choosing the right driver > download it > install it on your PC.
But if you’re a tech savvy guy, then further, there seems to be no harm in using a driver updater tool to update the driver on your computer. As it is the simplest & quickest method that will save your time.
Out of various convenient driver updater tools, our suggestion is Advanced Driver Updater. This tool possesses an advanced scan engine and is 1 of the market leaders that is serving the customers for their driver related problems for more than a decade.
After downloading the product, follow the on-screen guidance to install the program. Once you have installed Advanced Driver Updater, tap on the Start Scan Now button to start the scan for missing and outdated drivers. Now once the program lists all the outdated and missing drivers, you can update them all with a single click.
Check for the Malware on Your PC
If you’re facing a lag in the performance of Chrome, then it might be due to malware with which your PC is infected with. You might be informed or not, but Google Chrome has an inbuilt Clean Up tool that can detect and remove malware from your computer.
1. Launch Google Chrome and tap on the menu icon (3 dots) located at the top right corner of the browser screen.
2. Now, from the drop-down menu, pick Settings.
3. Scroll down to the last and tap on the Advanced.
4. Now again scroll-down to the end, and under the Reset and clean up section, tap on Clean up computer.
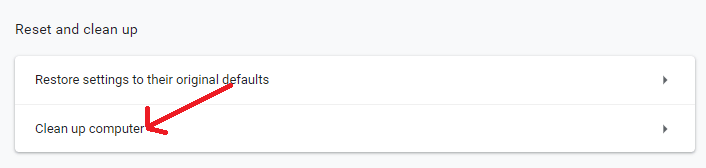
5. Now tap on the Find button to check for harmful software.

Chrome will scan for the malicious programs on your computer. Tap on the Remove button when you are asked to remove the malicious software.
Reset Chrome to Default Settings
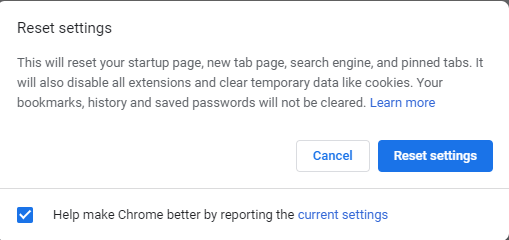
If closing the many tabs is considered as the first resort to speed up Google Chrome, then resetting Chrome to its default settings can be considered as the final resort. Furthermore, do note that resetting Chrome to default settings will reset the startup page, pinned tabs, and your favored search engine. All the extensions will be disabled & cookies will be cleared. Nevertheless, it doesn’t affect your saved bookmarks, passwords, and history.
To reset Google Chrome to its default settings, follow the actions below:
1. Launch Google Chrome and tap on the menu icon (three dots) located at the top right corner of the browser screen.
2. Now, from the drop-down menu, pick Settings.
3. Scroll down to the last and tap on the Advanced.
4. Now again scroll-down to the end, and under the Reset and clean up section, tap on Restore settings to their original defaults.
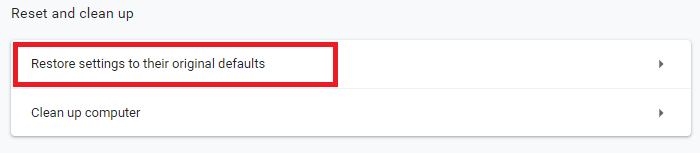
5. On the prompt that appears, tap on the Reset settings button
Now relaunch Google Chrome and check whether you feel any improvement in the performance and speed.
Clear your Browsing Data
Do you remember when you cleared the browsing data last time?. If you can not recall and think it’s ages ago, then, believe me, your cache and browser history have piled up to an extent where it has started deteriorating Chrome’s performance and speed. Therefore another tip to speed up Google Chrome is to clear the piled up browsing data and cache by following the steps below;
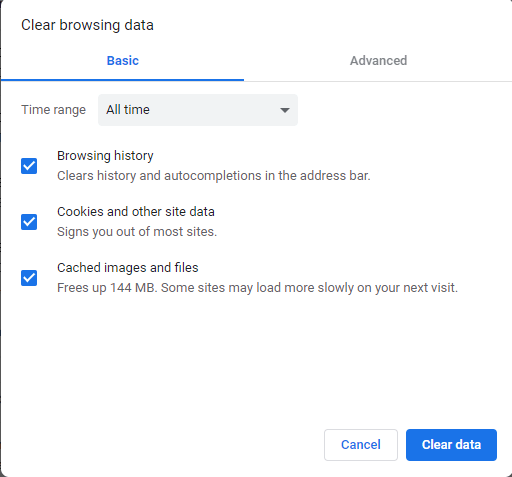
Please note that clearing browsing data has 2 versions Basic and Advanced before continuing with the steps.
If you continue with basic, it will clear the browsing history, cookies, and other site data, files, and cached images.
And if you continue with the Advanced version, then you have the choice to clear download history, Passwords and other sign-in data, Autofill form data, Site Settings, and Hosted app data.
Therefore we suggest you first try with the basic and then go with Advance if needed.
1. Launch Google Chrome and tap on the menu icon (three dots) located at the top right corner of the browser screen.
2. Now, from the drop-down menu, pick Settings.
3. From the left-pane in the menu bar, tap on Privacy and security. And in the right pane, tap on the option, Clear browsing data.
4. In the box that prompts, choose the time range and tap on the Clear data button.
Note: If you tried the Advanced variant, then you will now need to re-enter all your passwords and re-adjust the preferences when you go through all websites you visited.
Wrapping Up
We believe that you can now easily speed up Google Chrome by following the above-listed steps. Don’t forget to let us know about the action that has helped you to make Chrome run faster in the comment box below. Also, if you love our work, then do share it with your buddies and family.