How to Download Movies & TV Shows from Kodi
There are a lot of destinations that Kodi can stream Movies and TV Shows from, yet imagine a scenario where you need to download Movies and TV Shows and keep them until the end of time. This article will investigate how to download Movies and TV Shows on Kodi lawfully and securely.
What is Kodi ?
Kodi is a free programming media player from the Kodi Foundation. It will play various video Document positions, including MPEG 4, MJPEG, RealVideo, WMV, and that’s only the tip of the iceberg.
It can likewise stream video from sites utilizing applications called “addons.” Kodi can be introduced on Windows, Mac OSX, Android, iOS, Linux, and well known TV Devices like the Amazon Fire Stick, Nvidia Shield, and Apple TV.
The Most Effective Method to Download Movies And TV Shows using Kodi addons :
So as to download Movies And TV Shows on Kodi, you’ll have to do the Accompanying:
- Download Kodi
- Introduce an addon that permits Kodi downloads, (for example, B&W Movies)
- Quest for a Movies in the addon
- Right Click on the Movies
- Click on “Download”
From that point, your video will download to your preferred area.
We’ll investigate more in insight concerning the procedure, just as which addons you can rely on to permit you to download motion pictures reliably.
Download Kodi Movies and TV Shows to your Local Machine :
Additional items like Exodus are obsolete. Anyway you can check similar settings region of whatever addon you are as of now utilizing to check whether this works. In a great deal of cases, it does.
This will permit you to download media documents and watch them without being associated with the web, or with no buffering issues or source finding.
To begin with, you should guarantee that you have the Exodus add-on introduced, on the off chance that you haven’t, look at our guide for How to Install Exodus.
This guide additionally works with Genesis Reborn, for in case you’re having issues with Kodi.
We will make this instructional exercise utilizing Kodi 18 Leia, anyway the procedure is the equivalent in case you’re utilizing Kodi V17 Krypton.
In case you’re new to Kodi or new, a definite guide is underneath the guidelines including pictures.
Step By Step Instructions :
In case you’re utilizing Genesis Reborn over Exodus, simply rehash similar advances yet in the Genesis Reborn extra.
- Step 1 .
Go to addons > Video Addons > Open Exodus - Step 2 .
Select Tools from the main menu - Step 3 .
In the following menu, pick “Mass Migration: Downloads” - Step 4 .
Empower Downloads, Guarantee this is empowered - Step 5 .
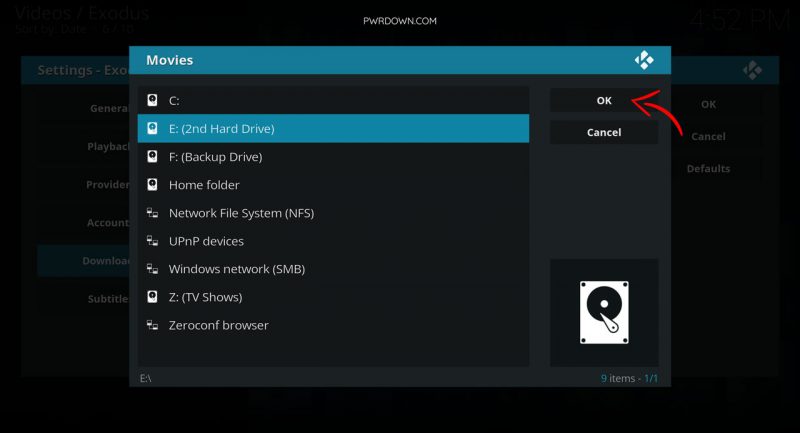
Click “Movies” and pick a catalog where you’d like downloaded records to go - Step 6 .
Do likewise for TV Shows - Step 7 .
When you have picked an index for the two items, press “alright” - Step 8 .
Presently discover the media you wish to download through Exodus, either Movie or TV Show - Step 9 .
Burden the sources rundown, and open the setting menu on one of the sources, by either Right clicking or Squeezing “C” - Step 10 .
Press the “Download” Fasten and Affirm! The File will be in your picked catalog once finished.
Detailed instructions with images :
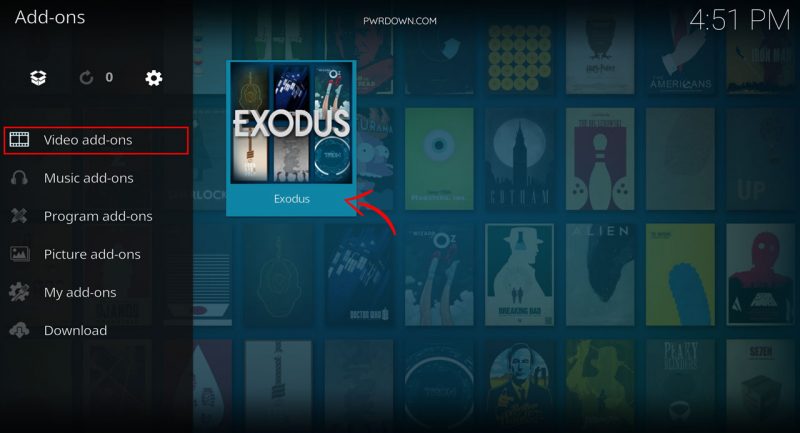
- Open the Exodus addon under Video Addons
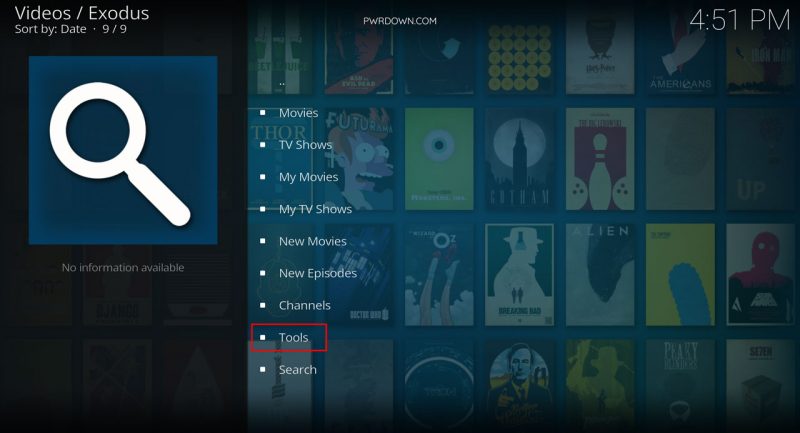
- Choose “Tools” from the first menu
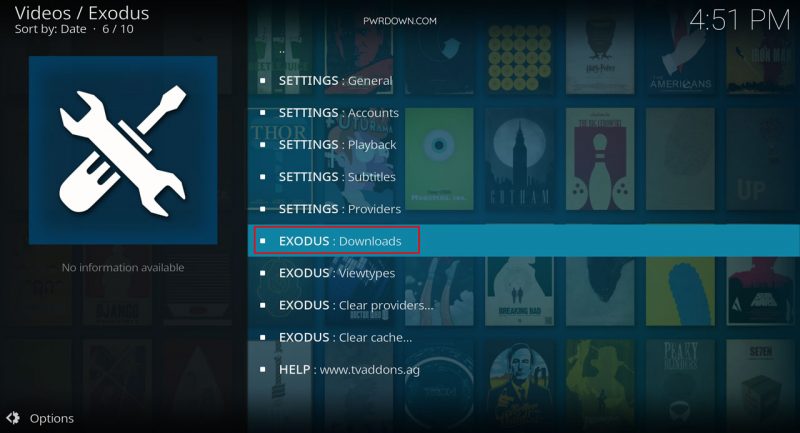
- Then select “EXODUS: Downloads”.
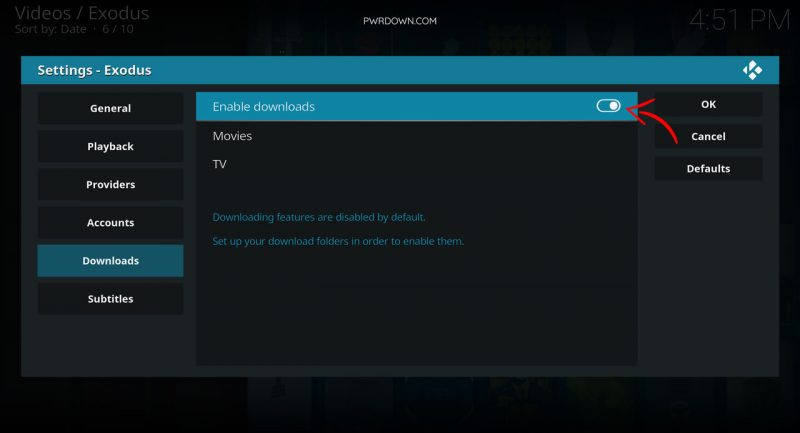
- Tick the “Enable Downloads” box
-
Click “Movies” and then choose a directory where you want any movies you download to be stored.
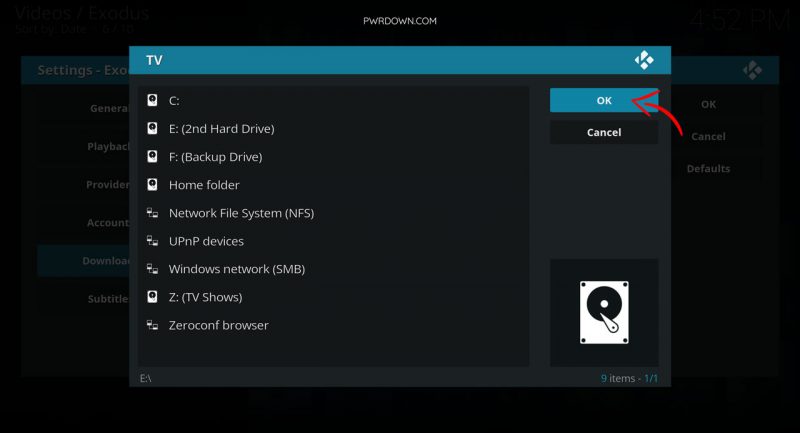
- Do the same for the TV Shows section.
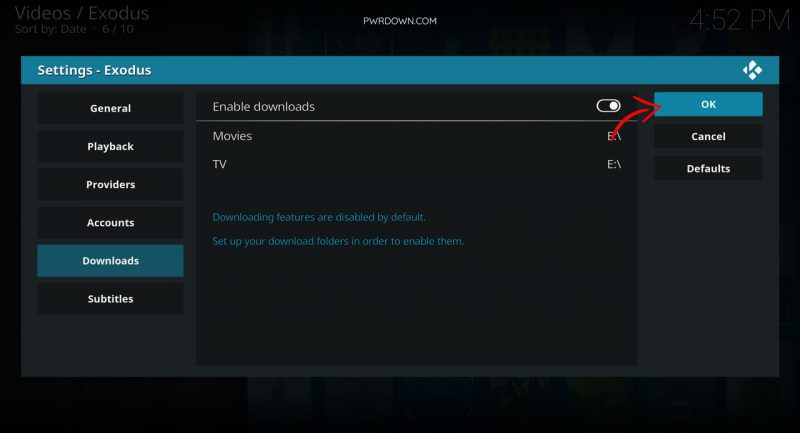
- Press “OK” once you have chosen a directory for both objects.
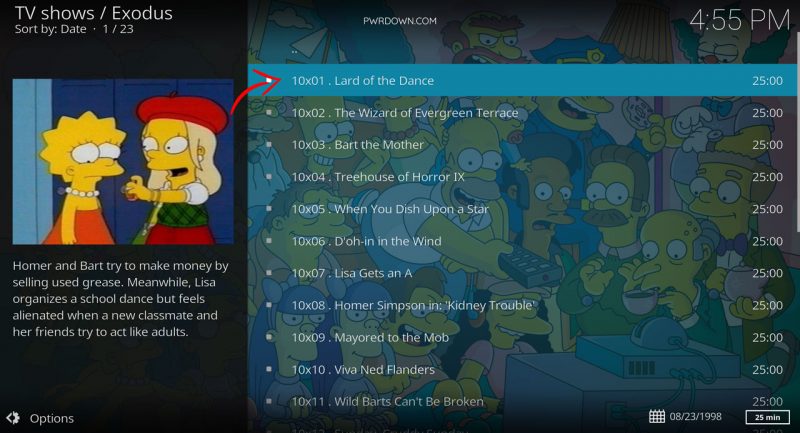
- Find a file you’d like to download, and click it so that the list of sources show up.
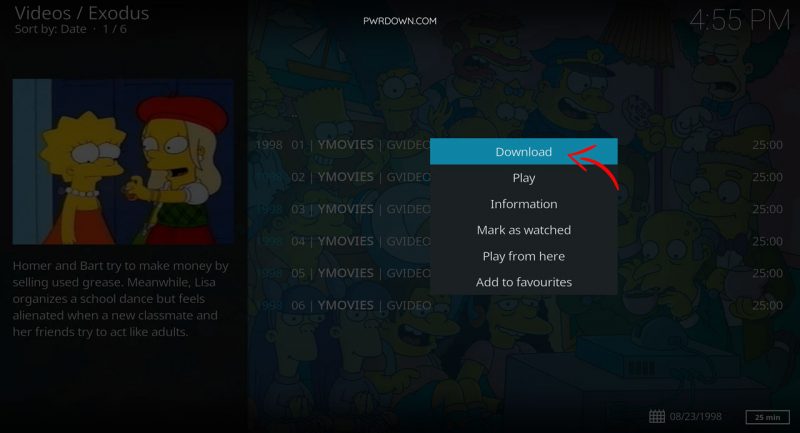
- Open the context menu whilst you’re hovering over a source, using either the right click button or the C keyboard button. If you’re using a remote, look for the menu button or context button. Click “Download”
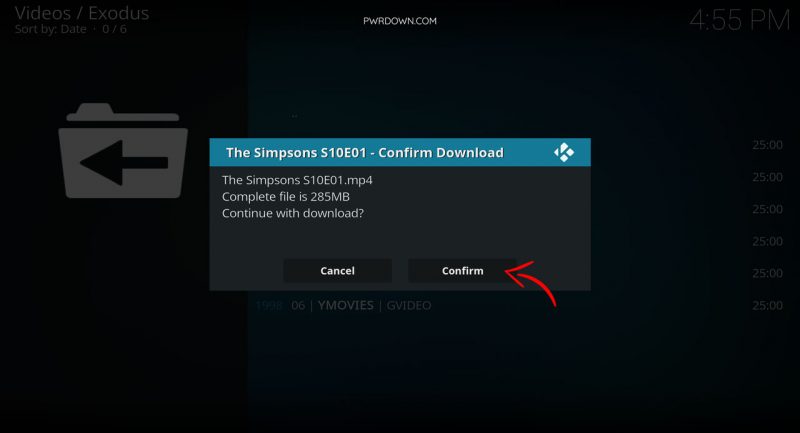
- Choose Confirm on the next box, and you’re done. Once the download has completed it will be in the directory you chose before.
Conclusion :
We trust you’ve delighted in this manual for Downloading Movies & TV Shows on Kodi lawfully and securely. For more data on the best way to locate the Best Movies & TV Shows utilizing Kodi, look at our other Kodi guides, including TOP BEST 40+ WORKING Kodi Addons List.
How To Install Kodi On Amazon Firestick – Without PC
For the individuals who have been living in a cavern for the recent years, the Amazon Firestick, is well, a stick and it gives you additional stuff to watch on your TV. It’s fundamentally the same as the Amazon TV box in spite of the fact that not exactly as ground-breaking and correspondingly connects to the rear of your TV in the HDMI port.
The Amazon TV stick permits you to stream Full HD content from administrations like Amazon Prime, BBC iPlayer and Netflix. You can likewise stream Music from Spotify and play a host versatile Games from the Amazon App Store. Probably the best thing about the Amazon Firestick is that you can introduce applications onto it and outstanding amongst other applications out there must be Kodi. In case you’re inexperienced with Kodi, it is open source media focus programming that has home diversion at the top of the priority list and obviously, it is thoroughly free.
Kodi was initially made for the Microsoft Xbox and was known as the Xbox Media Center (XBMC). The product has kept on advancing and has generated its very own network. It is overseen by the non-benefit XBMC Foundation and is kept up, adjusted and redesigned by several engineers far and wide.
What does Kodi do ?
Well it essentially permits you to turn PCs, cell phones and tablets into a computerized set-top box or streamer and furnishes clients with the capacity to stream documents from the web legitimately into your receiving area. The product includes a “10-foot UI”, which enables Kodi to be perused from a hypothetical separation of up to 10ft away so you have an incredible encounter whether you see it on a your extra large flat screen Television or a cell phone.
Step by Step Instructions to Install Kodi On Amazon Firestick Without PC :
Well here is our bit by bit manual for introducing Kodi onto your Amazon Fire TV stick. Its sufficiently simple and you can do it without utilizing your PC, yet you should follow the means precisely. By following this Guide, you can get all the Amusement gave by Kodi onto a little stick that you can heft around with you. So here we go!
Step 1 :
In case you haven’t simply got yourself an Amazon Firestick, you can get one here from Amazon.
Step 2 :
Plug in your Amazon Fire TV Stick into the HDMI space on the rear of your TV and force it up. We accept that you have experienced the enrollment for the remainder of this guide.
Step 3 :
With your Remote control explore to Settings Menu, click System and afterward click Developer Options and ensure that “Applications from Unknown Sources” is set to ON.
Step 4 :
Explore to Applications and set “Gather App Usage Data” to OFF.
Step 5 :
Explore to Search and type “ES File Explorer”. When you discover ES File Explorer, download and trust that the Establishment will finish. On the off chance that you get a Message saying “ES File Explorer introduce, you can erase its unused apk to spare 5.44MB”, at that point proceed a press OK to spare space. Once introduced, it might Popup a message saying “Locate another form, update now?”. In the event that it does, feel free to Squeeze “Update” to get the most recent form.
Step 6 :
In ES File Explorer, on the left hand side section, press the “Include” Button. In the “Add to top pick” popup, there will be two choices – Path and Name. Enter the accompanying:Way: http:\\kodi.tv\downloadName: kodiAt that point click the “Include” Button.
Step 7 :
Look down on the left hand side segment to “Kodi” which you have recently made a bookmark for and hang tight for the page on the correct hand side to completely stack. Once completely stacked, search for the green Android symbol. Underneath the green Android symbol, you should see two connections where it says “or APK introduce”. The main connection is “ARM”, the second is “x86”. Snap on the “ARM” interface. This is the ARM Version of Android. Clicking this will download the Kodi application as an APK record.
Step 8 :
Once downloaded, you ought to get a Popup saying “Download Effectively”. On this popup, click the “Open File” button.
Step 9:
You will presently get another popup with three fastens on it “Drop”, “Market” and “Introduce”. Click on the “Introduce” button.
Step 10:
You will presently get another popup saying “Would you like to introduce this application? It will gain admittance to:”. Once more, click “Introduce”. Kodi will at that point introduce as an application on your Firestick. Once more, you will get another popup saying “Kodi introduced, you can erase its unused apk to spare 57.88MB”. Once more, click “Alright” to spare space. A last popup will at that point say “Application Introduced”. Click “Open”. Congrats, you have effectively finished an introduce of Kodi on your Amazon Firestick!
Conclusion :
In the Article that you follow this instructional exercise cautiously, you shouldn’t get any blunders. On the off chance that you do get any issues, let me know in the remarks and I’ll enable you to out. It would be ideal if you share this post with your companions in the event that you have thought that it was valuable.

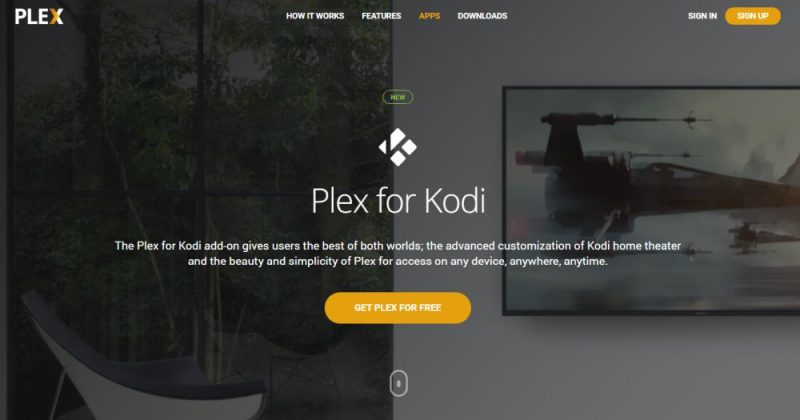
How to Install the Plex Add-on in Kodi
The Plex Add-on in Kodi gives you the best of the two universes. When discussing media players, the discussion with respect to which of Plex or Kodi is better will never end. Both have likenesses yet they are totally different. Furthermore, supporters of one are regularly unequivocally contradicted to the next. In this article, we’ll tell you the best way to introduce the Plex Add-on for Kodi and take you through a guided voyage through its primary highlights.
Plex in A Nutshell :
Before we start introducing the Plex Add-on Kodi , we should delay and see what Plex is about. Plex began as a fork of XBMC—Kodi’s precursor—when a couple of engineers left the XMBC group somewhere in the range of ten years back because of “inventive contrasts”. From that point forward, XBMC advanced into Kodi and Plex developed too however took an altogether different bearing. Much the same as Kodi, Plex is a media player… kind of. Be that as it may, truth be told, it’s more a media SERVER than a player and it requires a customer to play its substance.
In spite of Kodi, Plex isn’t open-source programming. In spite of the fact that the fundamental programming is accessible for nothing out of pocket, a portion of its highlights are just accessible through the paid Plex Premium membership administration. Among the most intriguing highlights of Plex Premium are the PVR work, the capacity to watch (and record) live OTA TV utilizing a good PC appended tuner and a choice to run a Plex server in the cloud as opposed to on your nearby system and access it from anyplace, as long as there is access to the Internet.
Another significant contrast among Kodi and Plex is their individual additional items structure. Kodi has its “official” storehouse just as many different repos where you’ll discover a wide range of additional items. Plex additionally has additional items—which they call Channels—that are accessible straightforwardly from Plex. There is an Unsupported App Store for Plex which will give you access to some additional channels. And keeping in mind that it is similar to Kodi’s “informal” scene, it is on an a lot littler scale.
What is the Plex Add-on for Kodi ?
The Plex Add-on for Kodi is a Plex customer that runs as a Kodi. It gives you the best of the two universes. It lets you use Plex on a media server to arrange and deal with your video library while letting you get to that library directly from inside Kodi. No compelling reason to exit Kodi and start a different Plex customer on the media box which is associated with your TV. You get the upsides of the Plex media server and the wide additional items determination of Kodi.
An extraordinary thing about this extra is it is an “official” add-on. It is along these lines completely bolstered by both the Kodi and the Plex groups. What’s more, being a true blue extra, it won’t almost certainly vanish like such a large number of incredible additional items that go back and forth all the time. This one is digging in for the long haul.
Introducing the Plex Add-on for Kodi :
By goodness of being an official extra, introducing the Plex for Kodi add-on couldn’t be less complex. No compelling reason to complain with establishments sources or archives. You won’t have to empower outside sources. Adhere to our bit by bit guidelines and you ought to be ready for action in a matter of moments.
Before We Start :
These directions expect that you as of now have a Plex server introduced on a PC some place on your neighborhood organize. On the off chance that you don’t have one and need to begin with Plex, we propose you go to Plex’s site at www.plex.tv where you’ll discover all the data you need. Introducing and arranging a Plex server is definitely not a troublesome errand however it is past the extent of this article.
Installation Steps :
From the Kodi home screen, click Add-ons in the left pane.
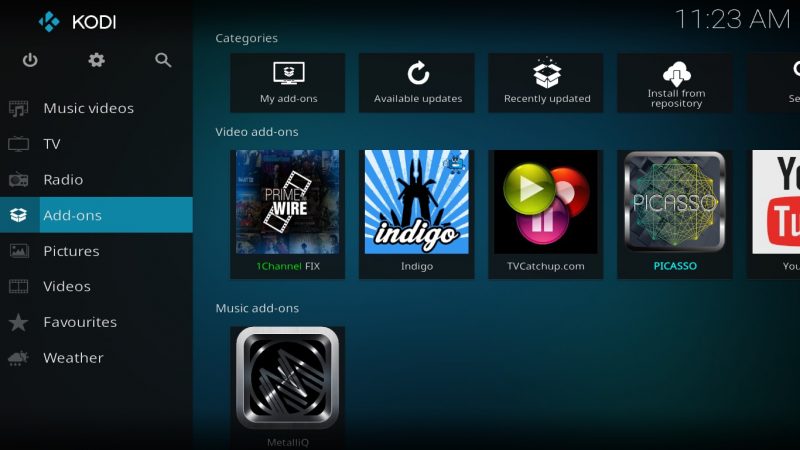
Then, click Download, also in the left pane.
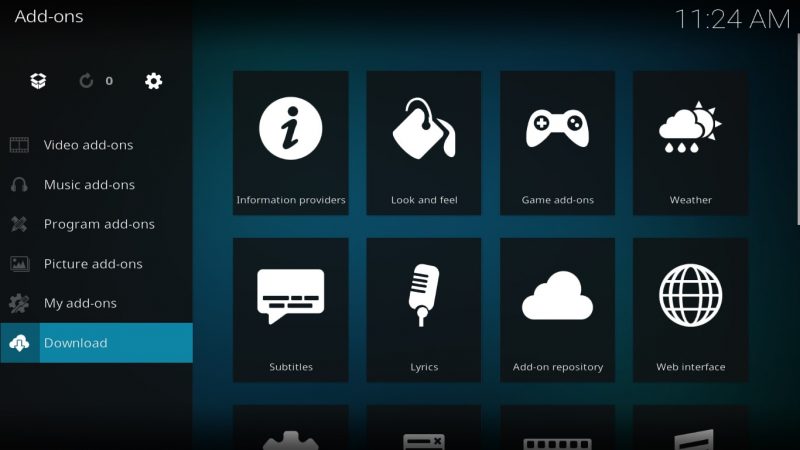
Click Video add-ons.
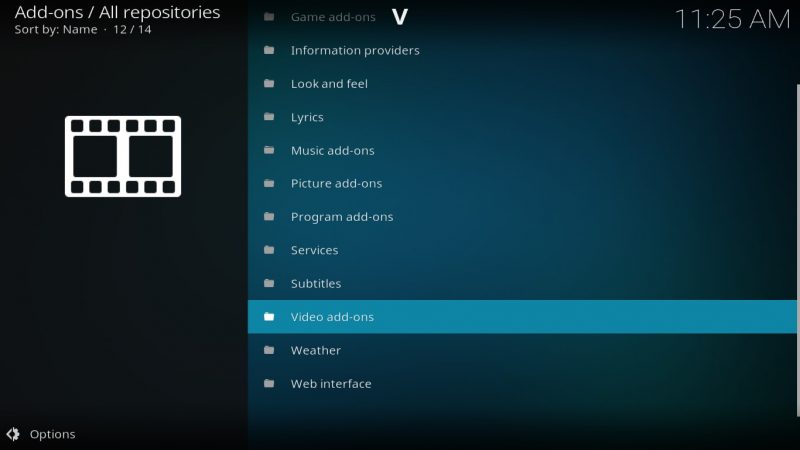
Look down the rundown and discover Plex. The length of the rundown will shift, contingent upon what number of vaults you have introduced. In the event that it’s another establishment without any vaults, just “official” additional items from Kodi will be appeared and the rundown will be moderately short.
When you’ve found Plex in the rundown, click it to uncover the Plex add-on data screen.
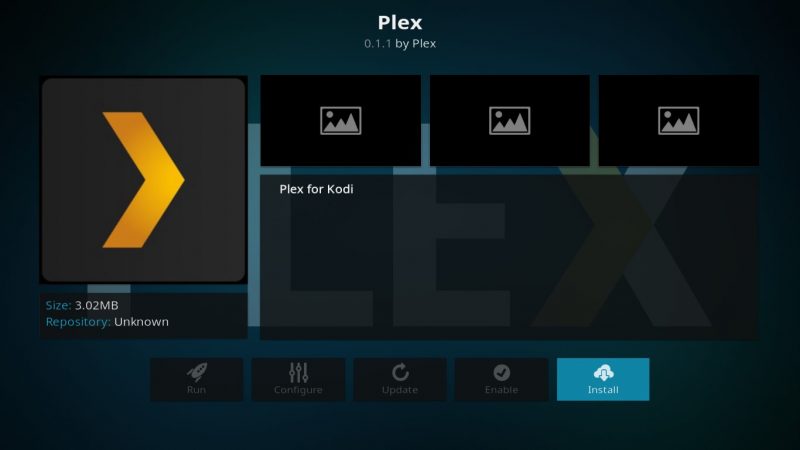
Click the Install button at the bottom right of the screen
After a few seconds, a message at the top right of the screen confirms the successful installation of the add-on
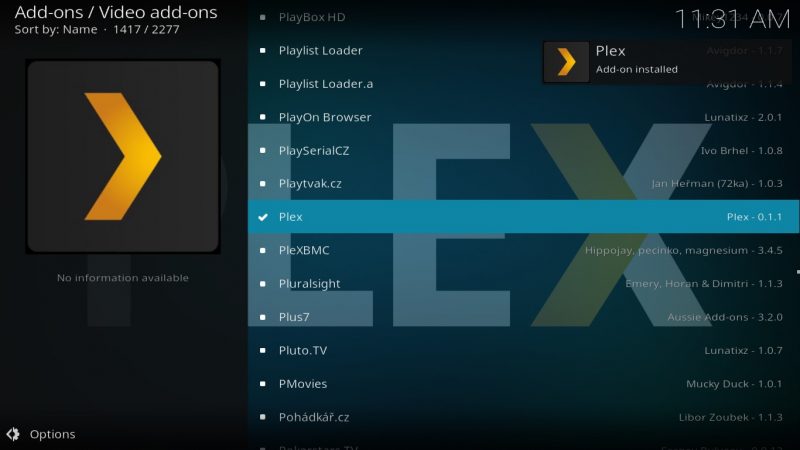
Now that we’ve successfully installed the Plex for Kodi add-on, we’re ready to have a look at its features.
A Tour of the Plex Add-on for Kodi :
Upon first starting the Plex Add-on for Kodi after its installation, you’re presented with its splash screen
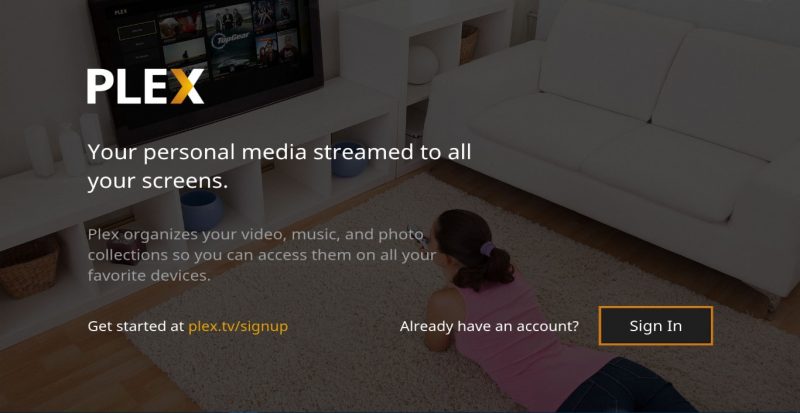
You have to combine your Plex Add-on for Kodi with your Plex server by first marking into your Plex account. Snap Sign In at the lower right of the screen.
Kodi will create a code, show it on screen and welcome you to visit Plex’s site from a web browser.
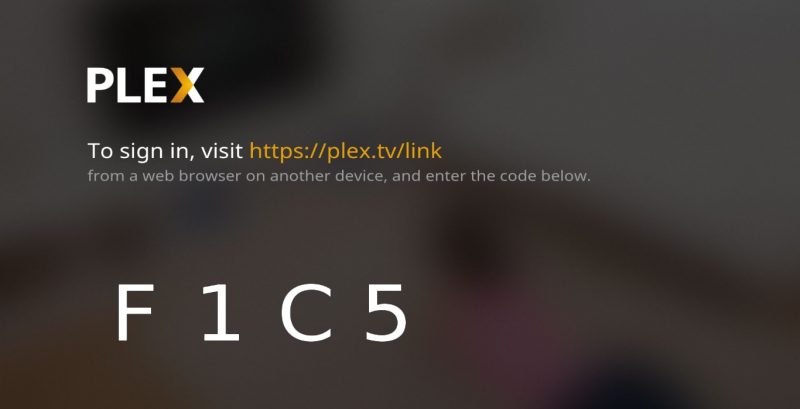
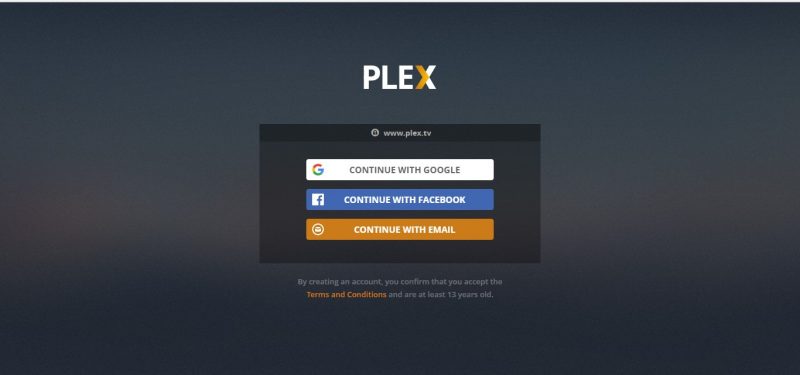
When you get to the Plex website on your browser, you’ll need to login to your Plex account, either using your Google or Facebook account or your email and password.
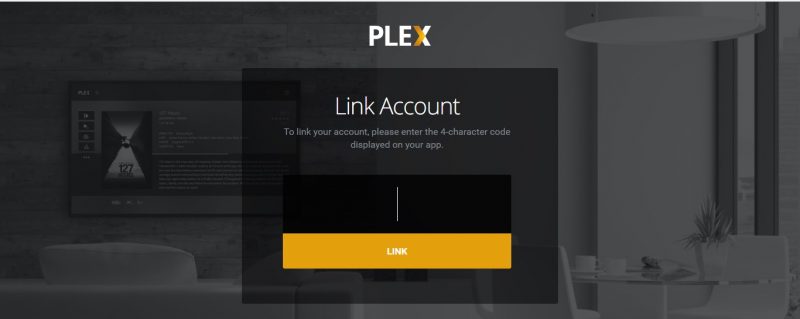
Once you’ve successfully logged in, you’ll be asked to enter the code generated by the Kodi add-on.
Enter the code to be greeted by the successful pairing screen.
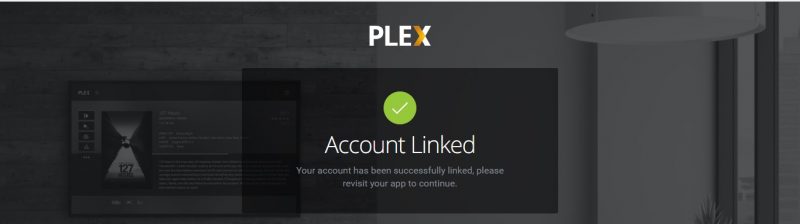
You may now go back to your Plex Add-on Kodi and see its main menu.
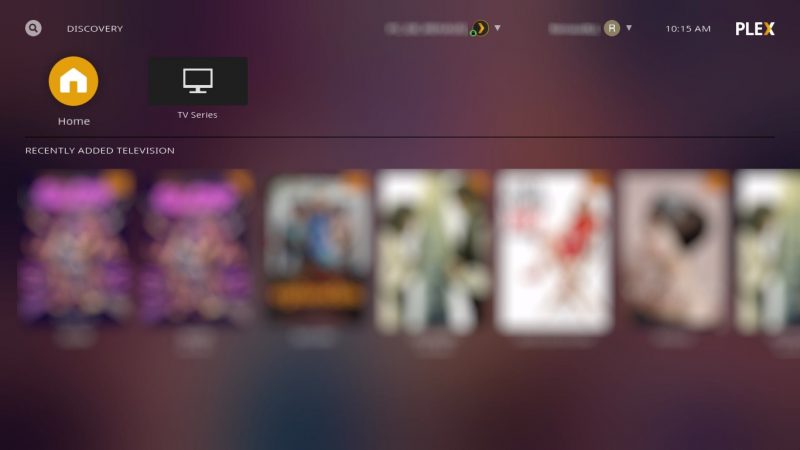
The principle menu you’ll see will be not quite the same as this one and is to a great extent dependent on your Plex arrangement. The Plex Add-on for Kodi just shows what’s accessible on your chose Plex server. Also, discussing servers, there could be a few of them enlisted with your Plex account. A drop-down rundown at the highest point of the screen enables you to choose a server. A great many people have just a single server, however, so it ought to be chosen as a matter of course.
The extra’s fundamental screen shows you as of late included substance your server and has catches at the top to go to the Plex server’s home or to any of the libraries designed on the server. As should be obvious in this model there is just one, called TV Series.
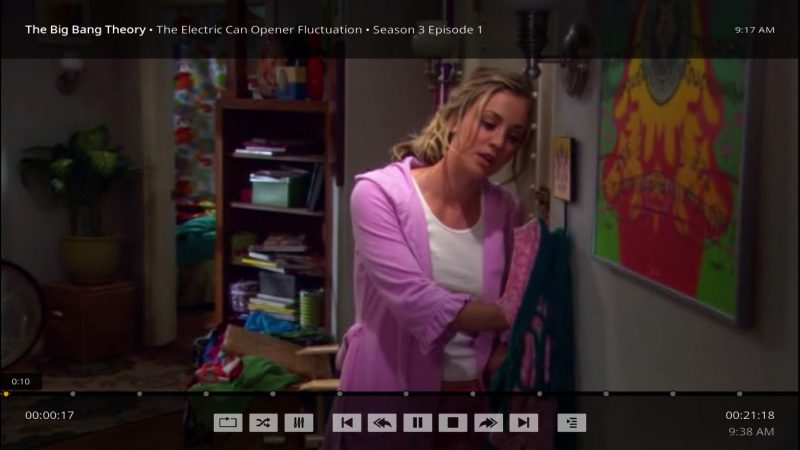
You can explore the substance and play any choice by just clicking it. In spite of the fact that the UI’s look and feel are not quite the same as other additional items and could take some time becoming accustomed to, its fundamental usefulness is comparative and you should feel right comfortable.
An Expression of Alert!
There is something we discovered when working with Plex that we thought ought to be referenced. Any expulsion of substance from your Plex library will likewise erase the genuine document on the PC. There is a notice that shows up on screen yet we discovered it didn’t plainly express that it was going to erase genuine documents from the plate. This conduct is altogether different from what you’d see when erasing content from the Kodi library.
In Conclusion :
Both Plex and Kodi are incredible items. Every ha its focal points and hindrances. At the point when contrasted It’s practically unimaginable with recognize a reasonable champ. Every item has its fan base who will contend that “their” item is far better than the other. Which of them is best for you presumably relies upon a couple of things.
On the off chance that you as of now have a Plex server and are likewise running Kodi on some TV-connected media player, the Plex Add-on for Kodi will let you get to that substance without exiting Kodi and start a different Plex customer application. In the event that you don’t, introducing and setting up a Plex server probably won’t merit the difficulty. That is, obviously, except if you need to have the option to design your media assortment in a solitary spot and access it from different areas/gadgets.
Our best counsel is that you check out it and see with your own eyes if the Plex Add-on for Kodi is for you. What’s more, when you’ve attempted it, why not mention to us what you loved and didn’t care for about it. Have you had any issues introducing it or making it work? Utilize the remarks underneath and share your involvement in us!
How to Install The Latest Version of Kodi on the Fire Stick or Fire TV
Kodi is by a wide margin perhaps the best medium revolve applications around. It’s free, simple to utilize, runs on a wide assortment of gadgets, and it bolsters a huge amount of incredible outsider additional items, everything from live games to music to live TV channels. You can even download custom Kodi works for Fire TV!
Staying up with the latest with Fire TV can be somewhat more Troublesome than on different gadgets however, all because of the idea of Kodi introduces. On the off chance that you think your adaptation of Kodi is beginning to fall behind, read on for our full guide on the best way to introduce the most recent rendition of Kodi on the Fire Stick or Fire TV.
Preparing Your Fire Stick for Kodi Installation
Since Kodi isn’t Accessible to download legitimately from the Amazon application store, you’ll have to experience a procedure known as Sideloading to get it introduced. It isn’t as unpredictable as you would might suspect, however before you start, there are a couple of things you should check first.
Recommended vs Nightly Builds
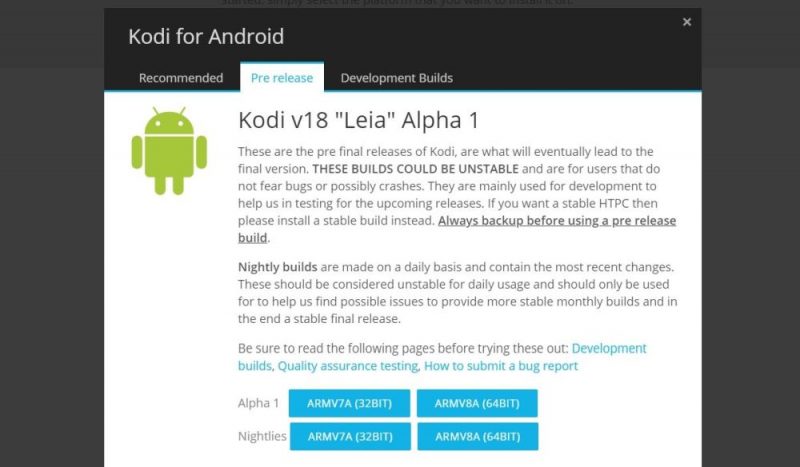
At the point when you head to Kodi’s downloads page and snap on the Android symbol, you’ll notice a few tabs at the highest point of the screen: Recommended, Pre-discharge, Development Builds. These three segments split the downloadable substance into classifications intended for a marginally extraordinary crowd. Which one you pick relies upon your particular needs.
Nearly everybody will need to remain on the Recommended tab and download the most recent stable rendition of Kodi. This might be a full discharge cycle behind different tabs, however the similarity is ensured, and you won’t run into any sort of accidents or different mistakes that may be available in pre-discharge or advancement constructs. Furthermore, since sideloading takes additional time than a brisk “click and introduce”, you would prefer not to experience another update each couple of weeks.
Pre-discharge fabricates are semi-stable alpha and beta arrivals of the up and coming Kodi adaptation. This will be somewhat further ahead than the suggested “stable” form, yet you can run into similarity and smashing issues, since the product isn’t finished. Improvement manufactures are much more forefront than the pre-discharge assembles and can be refreshed as regularly as consistently.
Except if you need indisputably the most recent in Kodi programming and wouldn’t fret sideloading an apk document like clockwork, consistently download the suggested work for Kodi, as it’s the most recent stable discharge.
Verify Your Kodi Version Number
In case you’re introducing the most recent adaptation of Kodi, you’ll first need to ensure it’s really fundamental! Huge Kodi refreshes are just discharged a couple of times each year, at their generally visit. Follow the means beneath to check the adaptation number of your Fire TV’s Kodi establishment.
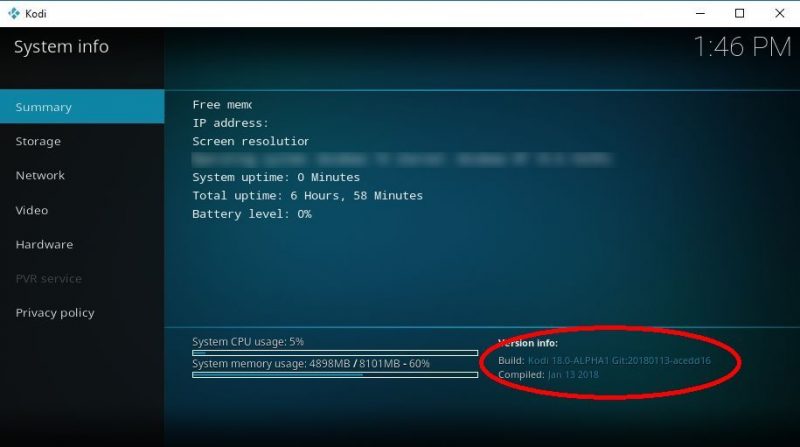
1. Run Kodi on your current Fire TV or Fire Stick device.
2. Go to the main menu and click or tap the Gear Icon to enter the settings page.
3. Scroll down to the System Information icon.
4. Make sure you’re on the Summary tab.
5. The Kodi version number will be displayed in the lower right corner of the screen where it says “Build”.
6. Take this build number, then go to your PC Web Browser and visit the Kodi downloads page.
7. Scroll until you see the Android Icon and click it.
8. Look under the “Recommended” tab for the current Kodi release. If it’s equal to what you have installed, there’s no need to upgrade.
Allow Unknown Sources
Introducing programming to your Fire TV gadget implies experiencing the procedure of sideloading. The Fire TV working framework has a default setting that handicaps outside establishments as a matter of course, so as to add Kodi to your framework, you’ll have to cripple it. Doing this is superbly protected and won’t hurt your gadget in any capacity. Follow the means underneath and you’ll be prepared to sideload in only a couple of moments.
1. Go to your Fire TV’s Settings Page located at the top of the home menu.
2. Scroll right and choose Device
3. Move down to Developer Options
4. Set Apps from Unknown Sources to ON.
5. Accept the Warning Message about installing external apps.
Should You Uninstall the Old Version of Kodi First?
Except if you need to begin once again from a crisp introduce of Kodi, there’s positively no motivation to uninstall the past form of the product before getting the most recent discharge. Indeed, it’s better on the off chance that you leave the first one introduced, as this will safeguard your settings, additional items, and sources so you don’t need to arrange everything once more. Basically introduce the new Kodi over the bygone one, that is it!
How to Install the Latest Version of Kodi on Fire TV
Prepared everything set up and to go? The real establishment process is a breeze once you’ve gathered every one of the materials. Underneath we’ll cover three of the principle sideloading strategies a great many people use for adding new applications to their Fire Stick and Fire TV gadgets. You can pick any one you like.
Method 1 – AdbLink
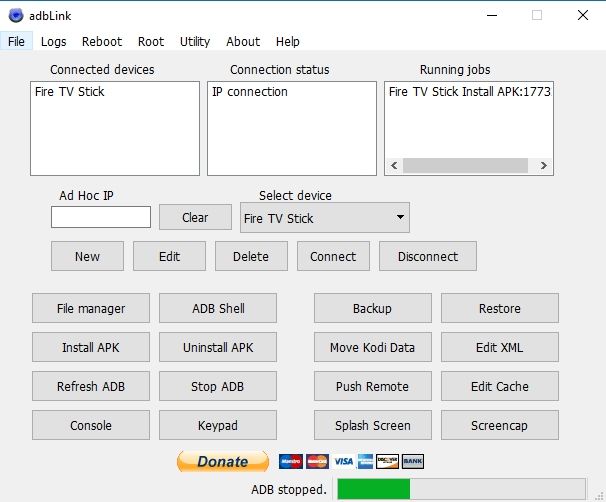
On the off chance that you have a decent PC or work area PC on a similar system association as your Fire TV gadget, or on the off chance that you need to sideload or deal with various apk records effortlessly, utilizing adbLink is by a wide margin your best alternative. This free programming lets you associate with your Fire Stick to remotely include new projects, uninstall applications, and even peruse the inherent record structure. It’s an inconceivable apparatus no Fire client ought to do without, particularly in the event that you sideload applications all the time. Accessible for Windows, Mac OS and Linux.
Below are the instructions for installing adbLink and using it to sideload the latest version of Kodi on your Fire TV or Fire Stick device.
1. Switch on your Fire TV stick and turn on the connected TV.
2. Make sure “Apps from Unknown Sources” is set to ON. If you followed the preparation steps above, it will be set.
3. Go to Settings > About – Network and write down the IP address of your Fire TV Stick.
4. Visit the adbLink website on your PC and download the program.
5. Install adbLink and launch it.
6. In adbLink, click “new” next to the devices box to add your Fire TV Stick.
7. Type the IP address of your Fire TV Stick into adbLink and save the changes.
8. On your PC, visit the Kodi download page, click on the Android icon, and get the ARMV7A version of the apk. Save it somewhere easy to access, like your computer desktop.
9. In adbLink, click the Install APK button.
10. Select the .apk update file you just downloaded.
11. Click Yes when the Install APK prompt appears.
12. The new version of Kodi will install to your Fire TV Stick and be available to use in a few moments.
Method 2 – Downloader App
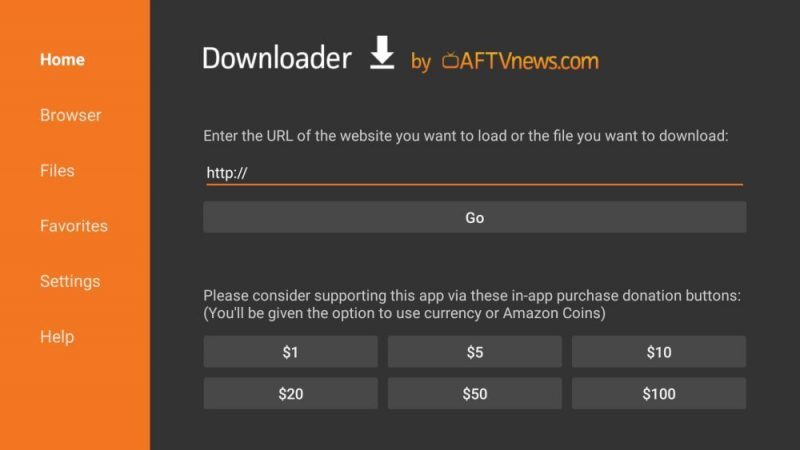
On the off chance that you don’t approach (or simply would prefer not to utilize) a different PC program to sideload, the Downloader application is a fabulous elective strategy. All you have to do here is get the application on your Fire TV by downloading it from the inherent commercial center, type in the URL to the Kodi apk, at that point introduce. It’s straightforward and simple, however composing long connections utilizing the Fire Stick remote can be something of an issue.
Follow the steps below to use Downloader to sideload Kodi onto your Fire device.
1. Open the Amazon Appstore on your Fire TV by going to the home page and choosing Apps.
2. Browse for Downloader under the utilities category and install it.
3. While that installs, visit the Kodi downloads website on your PC.
4. Click on the Android downloads icon and stay on the Recommended tab.
5. Look at the direct link for the latest Android ARMV7A release build. It should automatically point to the latest version of Kodi.
6. Copy this URL somewhere safe. You could also take a picture using a smartphone.
7. Back on your Fire Stick, run the Downloader app.
8. Type the URL from above into Downloader’s URL box.
9. Downloader will fetch the file from the website.
10. When the download completes, choose to install and launch the apk automatically. Kodi will then be accessible from your Fire Stick at any time.
Method 3 – Apps2fire :
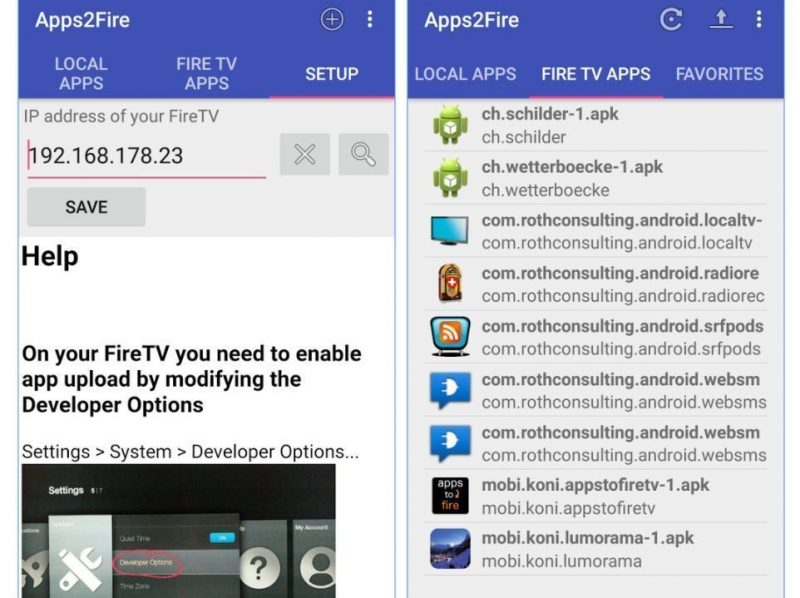
On the off chance that you have a different Android gadget you frequently use, introducing Kodi to your Fire Stick by means of apps2fire is presumably the most advantageous technique for sideloading around. The product just duplicates Android applications from your cell phone to Fire TV, it’s that basic. You’ll have to introduce Kodi on your other gadget first, yet then apps2fire will deal with the rest.
Follow the guide below to sideload the latest version of Kodi to Fire TV using apps2fire.
1. On a separate Android device from your Fire TV, install apps2fire. Make sure it’s the official one developed by Koni, not one of the copycats.
2. Install or update Kodi on the same Android device. There’s no need to visit the Kodi download website, just use the Google Play store.
3. Run apps2fire and let it create a list of your local installs.
4. When the scan is complete, slide the menu left and tap Setup.
5. On your Fire TV, go to Settings > About – Network and write down the IP address.
6. Back in apps2fire, enter your Fire TV’s IP address and tap “Search Fire TVs”.
7. Go to the Local Apps tab and scroll down to Kodi.
8. Tap the icon, then select “Install” when the window opens.
9. After a moment, Kodi will upload to your Fire TV and install. This can take a few minutes depending on the speed of your home Wi-Fi.
10. After a few moments, apps2fire will notify you when the install is complete. Now run Kodi on your Fire TV and you’re set!
Conclusion :
Kodi is a Fantastic bit of Programming that fills in as an informal option to Netflix and a substitution for many other mainstream bits of Programming. It runs like a Fantasy on Fire TV, also, so once you get it introduced and start Gushing, you’ll be snared!
How to Install Jailbreak Roku and Kodi – Full Tutorial
Got a State-of-the-Art Roku you’re itching to put to apply? The Inexpensive and Portable Streaming Tool is the right solution for getting Netflix on your TV, Watching Hulu, or Catching up on all of the Modern stay sports activities and TV Shows. The most Effective aspect that would make Roku even Greater powerful is that if it could run Kodi, the Free, Pretty extensible open-source media center software program.
Can you Jailbreak a Roku and Installation kodi? The quick answer is no, No longer precisely. As opposed to Jailbreaking your Roku, Though, you may use an Alternate method to get Kodi for your TV. We’ll cover all the details under. Before you start, though, make certain you are taking the right steps to comfortable your device so that you can use Kodi with complete privacy.
Before Using Kodi on Roku
The Kodi software itself is free and legal to use on a wide variety of devices. Some third party add-ons you can use aren’t quite as safe, however, which means Kodi has gotten a bad reputation as of late. This has caused companies and ISPs to take extreme measures against Kodi users, tracking, throttling, or even blocking their connections automatically.
VPNs can easily keep you safe from these privacy threats. They work by encrypting all of your traffic so it’s impossible to read. Hackers, government agencies, and internet service providers alike will be unable to determine what you’re doing on the internet or which streams you’re watching on Kodi/Roku. The bottom line is simple: if you want to stay safe, you have to use a VPN with Kodi.
Can You Jailbreak A Roku to Install Kodi?
Jailbreaking usually Refers to Hacking a device to allow it to run a Greater variety of software program. Not allowed to Install your favourite app on ios? Jailbreak it and do it anyway! Android and hearth Television Gadgets normally seek Advice from this as Rooting, however the primary precept is the same.
The Roku itself runs its very own operating Machine referred to as Roku os that isn’t well matched with popular android or iOS Jailbreaking Methods. However the Excellent News is Roku doesn’t certainly require any form of Jailbreaking to get at its complete Capability. You could add channels quite simply, consisting of custom homebrew ones, no hacking required.
Instead of Jailbreaking, Mirror Kodi to Your Roku
Under we’ll have a look at the Best opportunity approach to getting Kodi in your Roku tool. On the grounds that Jailbreaking isn’t possible, and due to the fact that Kodi doesn’t guide Roku os, we’ll Truely use a secondary Device and Mirror Kodi immediately to Roku, fine and smooth.
Step 1 – Enable Roku Screen Mirroring
Before you can mirror anything to your Roku, you’ll need to turn on screen mirroring. This is perfectly safe to do and only takes a few seconds.
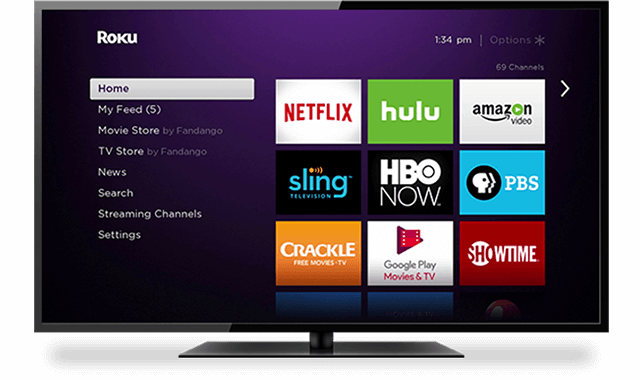
1. Go to your Roku and press the Home Button to access the main menu.
2. Go to Settings > System
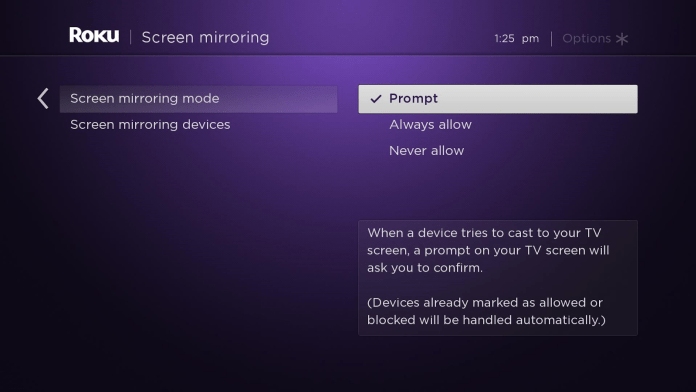
3. Choose Screen Mirroring from the menu.
4. Next to Screen mirroring mode, select either Prompt or Always Allow.
5. That’s it! Return to your Roku home screen.
Step 2 – Install Kodi on a Second Device (Android)
Now that your Roku is ready to go, you’ll need to get Kodi prepared on a secondary device. Which hardware you use really doesn’t matter, just as long as it’s capable of casting to your home network. We recommend using Kodi with Android for the best results, so that’s what we’ll cover below. You can also install Kodi on Fire Stick if you like, though you won’t be able to mirror it to Roku in this instance.
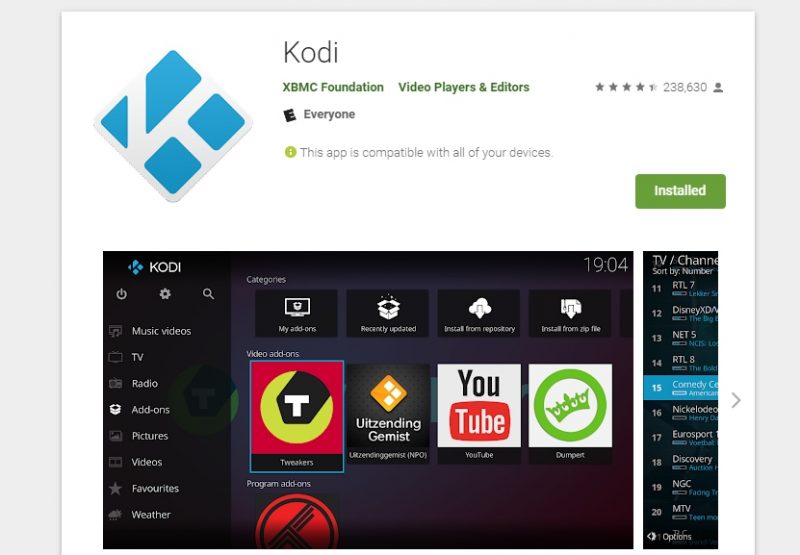
1. On your Android smartphone or tablet, open up the Google Play store.
2. Tap the Search bar and enter “Kodi”.
3. The Kodi media center app should show up as the first search result.
4. Tap the Kodi icon, then select the green Install button.
5. Accept the permissions requests if prompted. Kodi is perfectly safe to use.
6. Launch Kodi on your Android device to make sure it works.
Step 3 – Set Up Screen Mirroring
Any device you use with Kodi will now need screen mirroring to be set up. The steps below will let you quickly turn the features on so you can start watching some movies!
1. On your Android device, tap the menu button and look for the Settings screen.
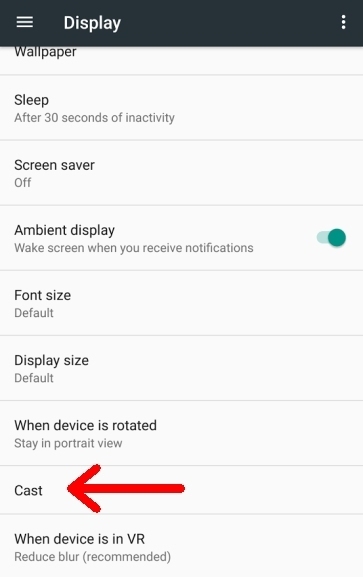
2. Scroll down to Device, then choose Display.
3. Search for the screen mirroring option in the screen. If you don’t see it, check the paragraph below for tips.
4. Open the screen mirroring options.
5. If you have your Roku correctly set up, you should see it on the screen mirroring screen.
6. Tap your Roku device on the List, then casting will begin.
To further confuse things, many Android makers give screen mirroring a different name. You may see it listed as Smart View, SmartShare, AllShare Cast, Wireless Display, Display Mirroring, Screen Casting, or simply Cast.
Step 4 – Start Screen Mirroring
Now that your Roku is set up and your secondary device is ready to cast, you can finally start watching Kodi! This is the fun and easy part, and if you followed the steps above, you should be able to pull it off without a hitch.
1. Turn on your TV and make sure your Roku is plugged in and active.
2. Open Kodi on your Android or other non-Roku device.
3. Choose a Movie or TV show to stream.
4. Launch the player and Start the video.
5. After a moment, the content should be displayed on your TV.
If anything goes wrong, the most likely candidate is your Wi-Fi network. Both the device you’re casting from and the Roku need to be using the same wireless connection in order for screen mirroring to work. You can’t sit in a cafe and mirror something to your house, for example. Make sure both devices use the same Wi-Fi signal and you’ll be good to go.
Alternatives to Streaming from Android
In ourManual above we Protected a way to Replicate your Display screen from an Android Tool to Roku for your Television. No longer absolutely everyone has an Android Tablet or cellphone, But, or even in case you do, Perhaps you need to Set up Kodi on a unique piece of hardware? Don’t fear, we’ve got you blanketed!
Screen Mirror Kodi to Roku from Windows
Home Windows is the arena’s most common PC Operating gadget. It Additionally occurs to have Simply the proper Equipment needed to screen Replicate Kodi to your Roku. Observe the Guide beneath (so as) to get the whole thing installation. Don’t be cast off with the aid of the range of Steps Required, it’s now not as complicated as you might think.
First, we’ll need to install Kodi on your Windows machine. If you already have it, feel free to jump to the next section.
1. Visit Kodi’s official website to get a fresh and clean copy of the program.
2. Click the blue download button at the top of the screen.
3. Scroll down to your operating system, represented by the icons.
4. Click the appropriate icon and a new window will open.
5. Make sure the Recommended tab is selected.
6. Click the installer button near the center to start downloading Kodi.
7. Once Kodi is downloaded, install it to your device, then launch it to make sure it works.
Next it’s time to set up screen mirroring for Windows. Note that even though Windows is capable of doing it, not all hardware will support casting. If the options below do not show up on your system, you’ll be unable to cast Kodi from your Windows PC. Try using an Android phone instead for seamless results.
1. Open the Control Center by tapping on the screen icon in the lower right corner of your device’s taskbar. You can also press the Windows key and P (Win+P) to directly open this menu.
2. Look at the flat icons and select the one that says Project.
3. Choose PC Screen Only from the list.
4. On the next screen, Choose your Roku Device.
5. Click to Start Mirroring your Screen.
Use a Mac to Screen Mirror Kodi to Roku
Sadly, Mac computer systems use the proprietary airplay Technology to display Mirror and solid content to and from mac gadgets. This indicates most non-Mac hardware is incapable of Mirroring content from your apple device, consisting of roku. No updates or workaround are available, though there is a odd Opportunity you can set up if you Definitely ought to have Kodi for your Roku and no different Alternatives are at your disposal.
Plex is an Extremely Beneficial and exceedingly bendy piece of Software Program that lets you movement content from one device to another. It has apps Available for just about each Device in the world, Together with Roku and Mac. You can simply Installation Kodi in your Mac, then upload a Plex extension to kodi and use it to flow sure content on your roku. It’s no longer as full-featured as kodi itself, and you Technically don’t want kodi to perform lots of the mirroring.
To start, go to your Roku’s channel guide and install the Plex app from there. This is a necessary first step, so make sure you don’t skip it. Next, check out our tips on how to install and use the Plex Media Server. This will help you stream your archived content from a Mac to another Plex-enabled device.
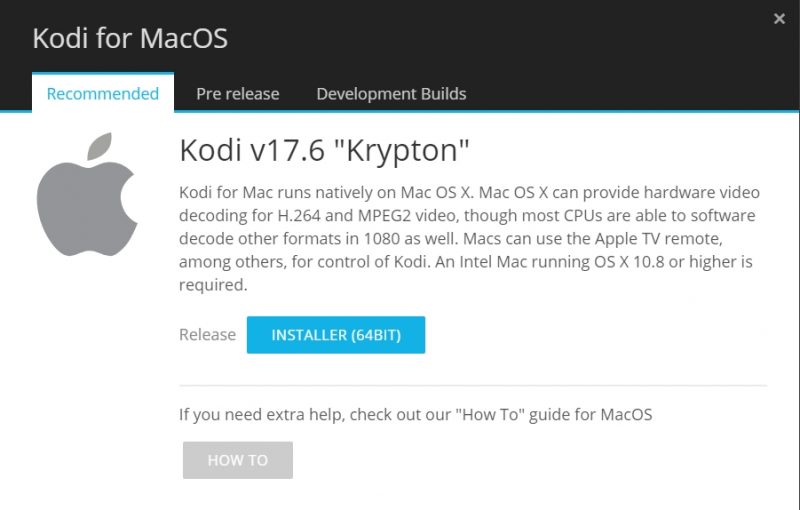
Now we need to install Kodi on your Mac. This is the easy part, so follow these short steps in order.
1. Visit Kodi’s official website to get a fresh and clean copy of the program.
2. Click the Blue download button at the top of the screen.
3. Scroll down to your operating system, represented by the icons.
4. Click the appropriate icon and a new window will open.
5. Make sure the Recommended tab is selected.
6. Click the installer button near the center to start downloading Kodi.
7. Once Kodi is downloaded, install it, then launch it to make sure it works.
Once all the above steps are complete, you’ll be able to launch Plex on your Roku, launch Kodi on your Mac, access the Plex add-on inside Kodi, connect the two together on your home Wi-Fi network, then use them to stream Kodi content from one device to another.
It’s an unwieldy setup, but it can work in a pinch. Installing Plex through Kodi doesn’t offer a lot of extra functionality, so if it’s stored content you want to stream and mirror, just use Plex on its own.
If having Kodi is really important, you can also pick up a Fire Stick as a replacement for your Roku and install Kodi directly to it. That will give you access to most of the same content as a Roku, with the added benefit of quick Jailbreaking and Kodi access.
Cast Kodi from iOS to Roku
Unlike Mac devices, there is actually a quick and easy way to mirror iOS content from your iPhone or iPad to a Roku device. It involves Roku’s official app, and that’s really it! Follow the steps below to get started.
1. Make sure your Roku screen mirroring is properly set up. See the guide in the first section for instructions.
2. Make sure your Roku and TV are turned on and ready to receive content.
3. Install Kodi on your iOS device. If you’re not sure how to do this, see our walkthrough and guide: Kodi on iPhone
4. Download the official Roku app for iOS.
5. Install the app on your iPhone or iPad and launch it.
6. Scroll to the Play on Roku section of your Roku app.
7. Now open Kodi and choose a Movie to start streaming on your TV.
Conclusion :
At the same time as you may’t immediately jailbreak a roku and installation kodi software program to it, there may be a easy workaround you could use to benefit get Admission to to the same content. Display mirroring is a powerful tool with a wide form of Packages, such as casting Kodi content material to your TV. With the Guide above you can have the whole thing up and walking in no time!
Have a question about any of our installation instructions? Get in touch with us in the comment section below!