We as of late experienced an establishment of Windows 10 with framework records that were degenerate to the point that certain areas of the Settings app would naturally near when being opened, among other bugs around the platform. After endeavoring normal repair alternatives, we utilized a Windows 10 ISO to perform an in-place overhaul, reinstalling Windows 10 whereas keeping our applications and all.
If this sounds Commonplace, we have secured a comparable prepare utilizing Windows 10’s built-in “Reset this PC” choice, but that expels your programs and as it were holds your records and settings on the recently introduced working framework, though once more, the in-place update indeed jam the computer program you’ve got introduced.

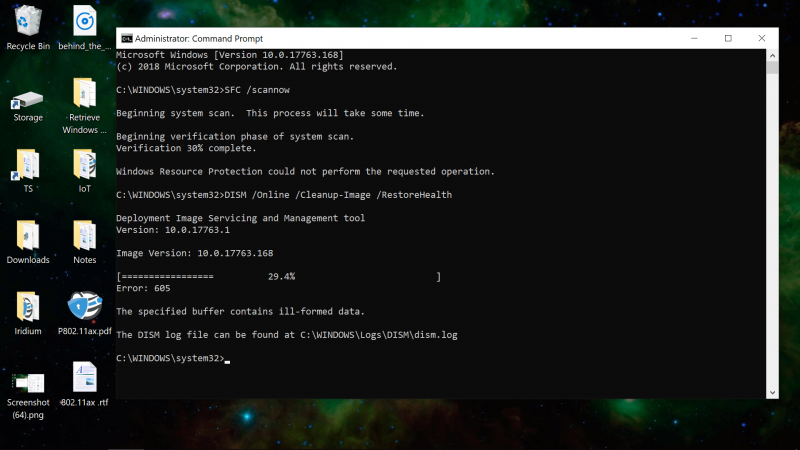
Running an in-place upgrade labored to restoration our instance of home windows 10 that couldn’t in any other case be repaired with command activate instructions which include SFC /Scannow and DISM /Online /Cleanup-Image /RestoreHealth – neither of which could finish their operation on our set up.
The Re-installation may be initiated from within windows using the setup.exe report on a windows 10 ISO/USB power or from the media advent tool, and the manner took round half an hour to finish on our Desktop Laptop.
Considering that even your applications are retained on the ensuing installation, if all is going as planned you may not should do tons later on and it’s clearly a direction of less Resistance in comparison to completely reinstalling home windows.
Getting started with an in-place upgrade
For starters, the in-place upgrade isn’t an option if you can’t boot into your installation. You must be logged in to a Windows account and that account must have administrator access. If you’re not an admin, you will be prompted for credentials when launching the installer.
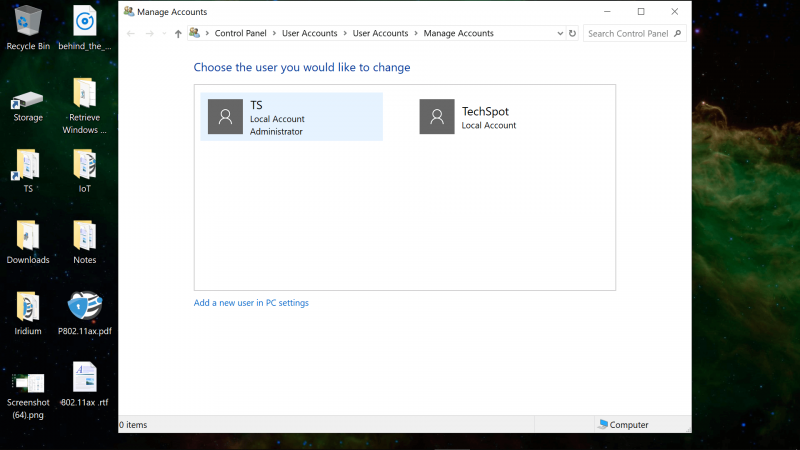
To check if you have an admin account, search Start for “change account type” or go to Control Panel\User Accounts\User Accounts\Manage Accounts\Change an Account\Change Account Type where all of the accounts on your Windows installation should be listed and those with admin-level access will say “Administrator.”
Double-click your account and then click “Change the account type” for the option to go from a Standard user to an Administrator.
You can also find this information by searching Start for Netplwiz.exe. With that application open, select your account and go to Properties then the Group Membership tab for the Standard user/Administrator toggle.
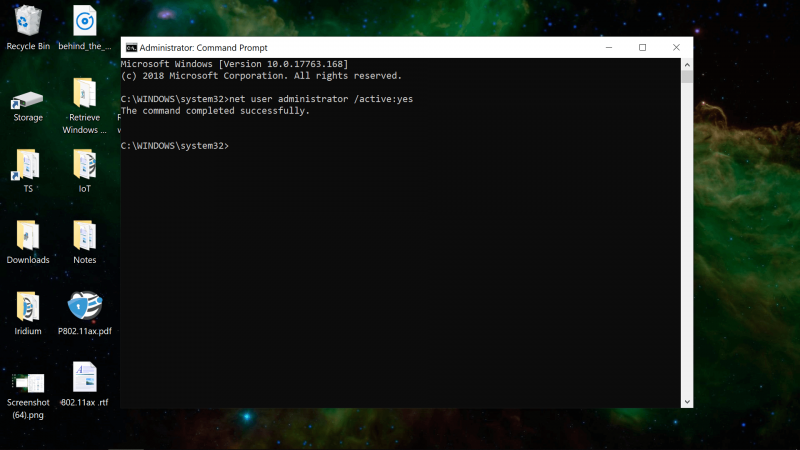
If you’re Unable to make your Account an Administrator, note that the Windows administrator Account is disabled by default and can be enabled from an elevated Command Prompt:
net user administrator /active:yes | enables administrator account (relog)
net user | lists all Windows accounts including the administrator account
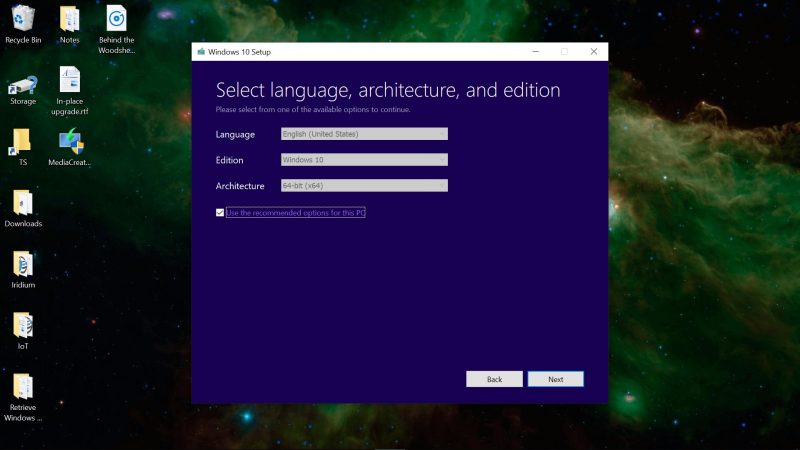
As another requirement for the in-place upgrade, your Windows ISO/USB drive/Creation Tool must contain the same edition of your operating system (or newer), as well as the same language and architecture (32/64-bit).
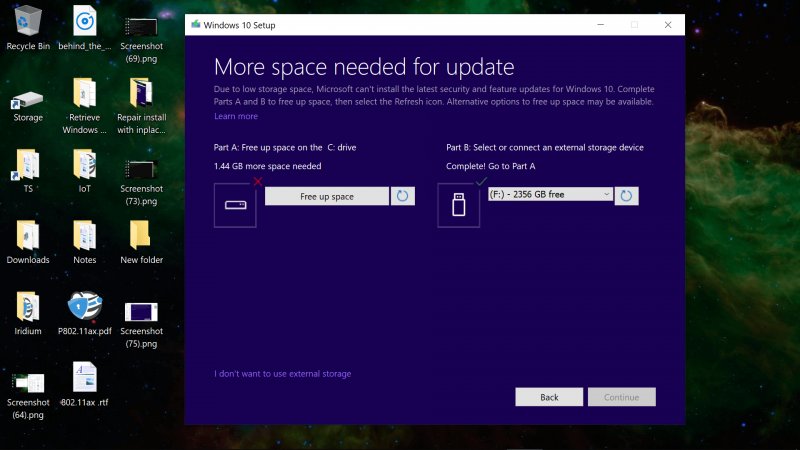
You’ll also need some spare storage on the Windows drive — around 8GB when we tested.
Conveniently, this step in the installation will help you with storage information, displaying capacity usage for different areas of your operating system, and you can also choose a secondary/external storage device from a drop-down menu of every drive attached to your PC.
Although you’ll keep all of your files and software, the Re-installation will delete certain items such as custom fonts, system icons and WI-Fi credentials. However, as part of the process, the setup will also create a Windows.old folder which should have everything from your previous installation.
If you have a UEFI system with Secure Boot enabled, it’s suggested that you disable Secure Boot before starting the in-place upgrade and then re-enable the feature afterward.
Actually Starting the in-Place Upgrade
Start the Windows setup (setup.exe) by mounting the ISO or opening the Windows USB installation drive from the File Explorer.
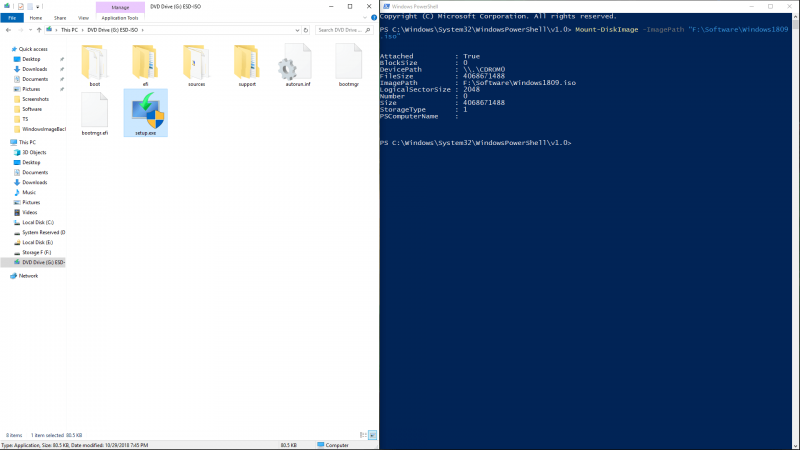
Windows 10 has native support for mounting ISOs by right-clicking and choosing Mount or by using the following Power Shell command (our installation was so broken that the right-click option wasn’t available to us):
Mount-DiskImage -ImagePath “C:\FileName.ISO”
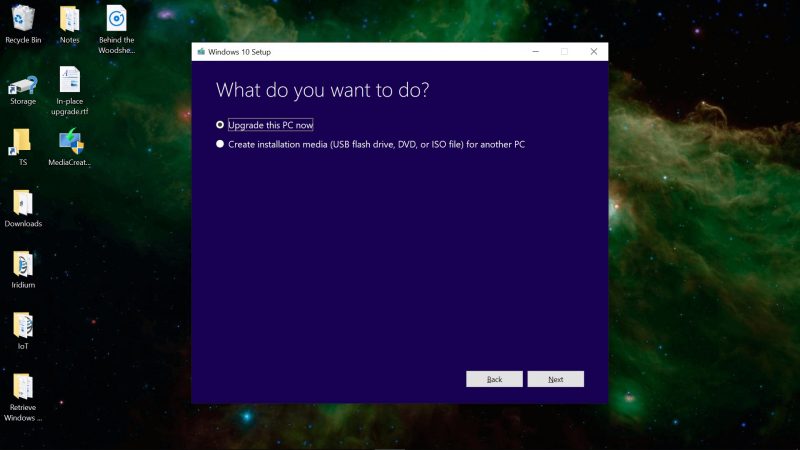
After launching setup.exe or the Media Creation tool, you’ll have the choice to upgrade now or to create an installation ISO/USB drive — you want to Upgrade this PC now. You might be prompted to download updates prior to this option being available.
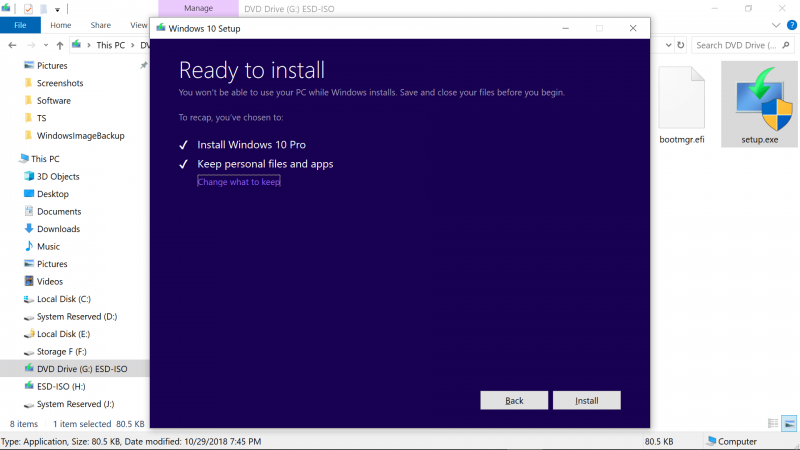
The installer will perform some initial setup/scans and eventually ask what you want to keep on the new copy of Windows.
If you intend to keep your currently installed software on the repaired operating system, make sure that “apps” are listed and not only “files” (Keep personal files and apps).
The rest of the in-place upgrade amounts to waiting about a half an hour for Windows to reinstall, which rebooted our system several times and didn’t require any further intervention from us.
When completed, you’ll load back into the same Windows environment where you originally started the “upgrade,” except with newly installed operating system files which should be bug-free.
After Completing the in-Place Upgrade
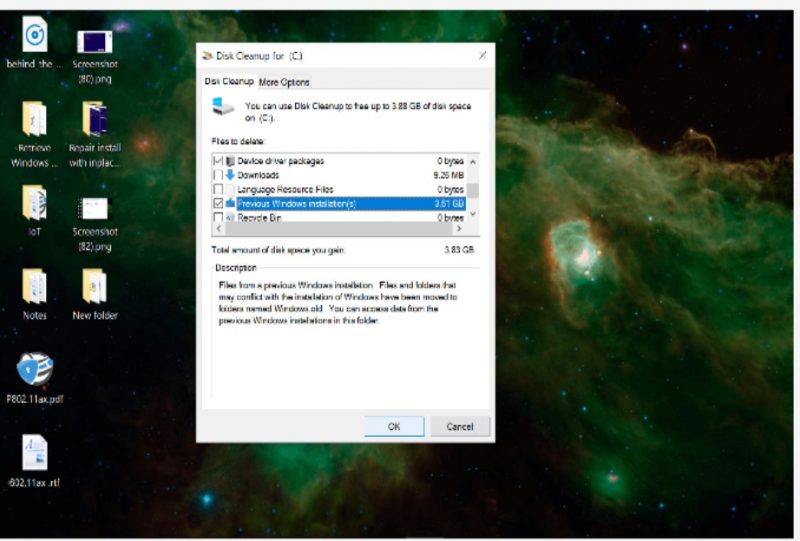
As mentioned before, although this Re installation retains your software and settings, the process creates a Windows.old folder with data from your previous copy of Windows. This folder occupies a large amount of storage and isn’t easily deleted directly from File Explorer, though you can browse the contents at C:\Windows.old.
Disk Cleanup can delete the Windows.old folder as well as other temporary installation files used in the setup: Search the Start menu for Disk Cleanup and then click “Clean up system files” to run a secondary scan that will locate Windows junk files.
When we scanned after the in-place upgrade, Disk Cleanup found 3.61GB of “Previous Windows installation(s)” and 225MB of “Windows upgrade log files.”
Other than deleting excess Windows data, you’ll probably have to relog into your WI-Fi network and you may have to install some Windows updates if you didn’t use the most recent Windows ISO. However, that ought to be about the extent of your chores after the in-place upgrade/repair installation.
Conclusion
If you’re having any issues while Reinstalling Windows 10. Then let us know from the comments section.