in this Article, i will guide you on a way to disable cortana permanently in windows 10 Home edition, pro, and organization. Cortana started out existence as a windows cellphone digital assistant earlier than switching to windows 10, iOS, and Android. with windows telephone useless and very few humans the usage of Cortana on a computer Microsoft made the tough selection to surrender competing with alexa and Google assistant.
In the meantime, since the release of windows 10, cortana has grow to be increasingly more restrictive. It has been updated to ignore your default internet browser. Cortana now always launches the Microsoft facet browser and makes use of bing best whilst you search. if that seems like something you wouldn’t want to use, right here’s how to turn it off.
How to Disable Cortana Temporarily
If Cortana often activates when you don’t want it, but you still want to be able to activate it manually, the first step is to make sure that Cortana doesn’t react to your voice.
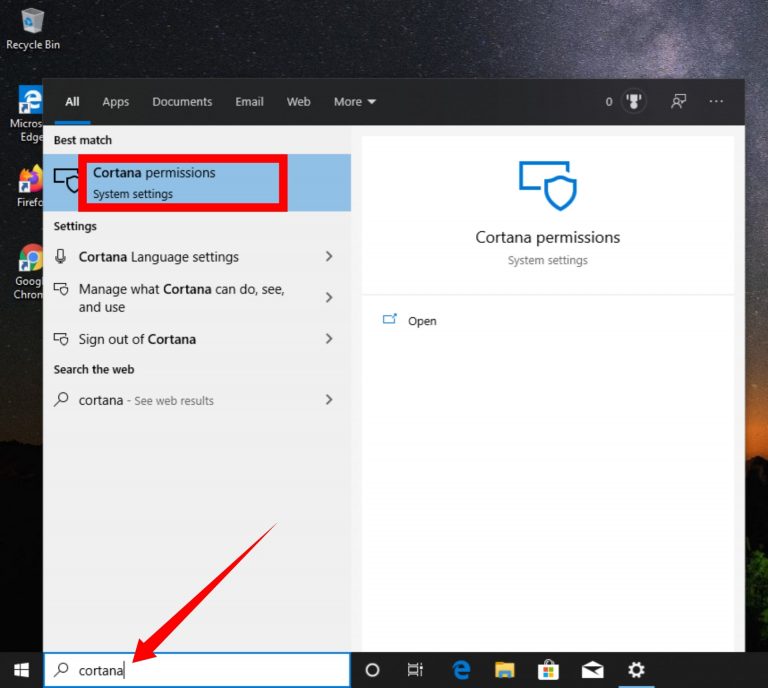
Step 1. Type Cortana in the Windows search box and select Cortana & Search Settings.
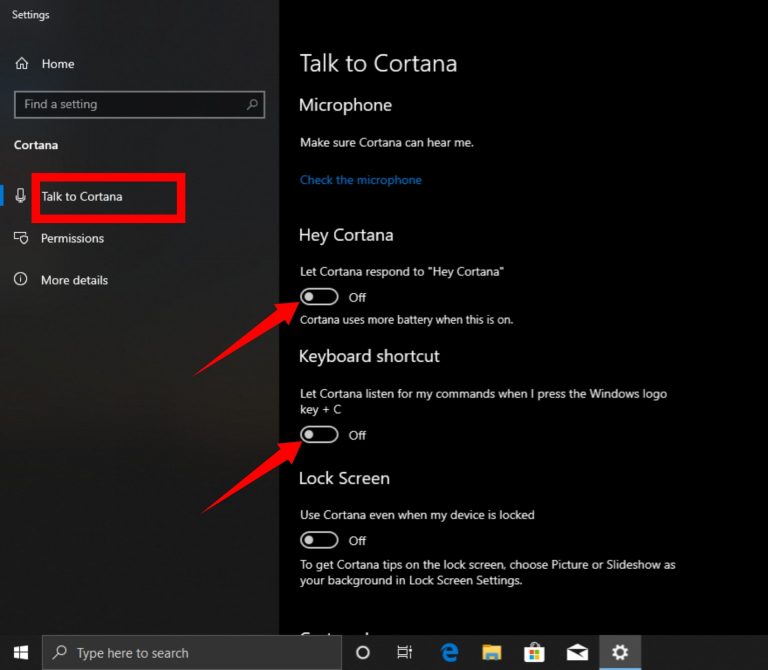
Step 2. Select the Talk to Cortana tab and make sure that the Hey Cortana and Keyboard shortcut switches are set to Off.
Disabling the ability of Cortana to respond automatically to a voice command or a keyboard shortcut is sufficient for most users. This will prevent Cortana from ever accidentally activating, but it will not affect your search experience, and all will continue to function as normal.
How to Disable Cortana Permanently in Windows 10 Home, Pro, and Enterprise Via Registry
The most effective way to disable Cortana in Windows 10 is to use Group Policy but Group policy editor is not available in Windows 10 Home edition. So the best method is to use Registry to disable Cortana in Windows 10 Home, Pro, and Enterprise.
Step 1. Press Win + R to open to Run or right-click the Windows icon and select Run.
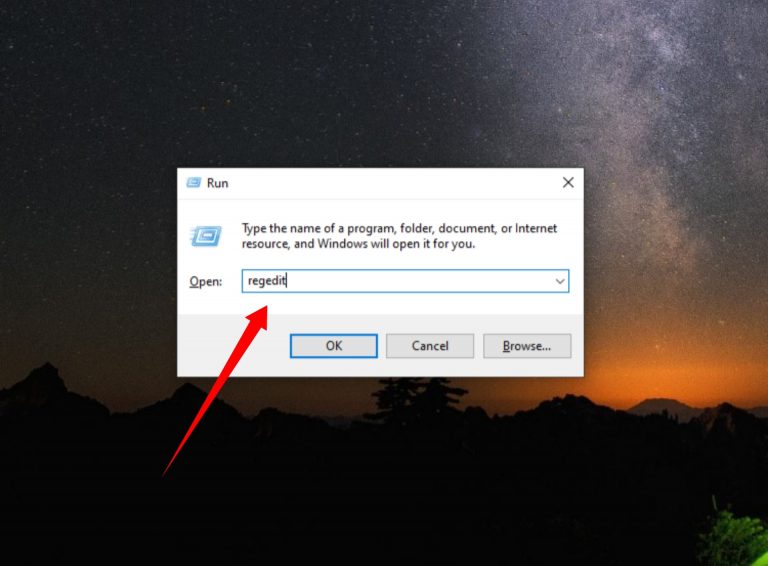
Step 2. Type regedit and press enter. If you’re prompted select Yes to proceed.
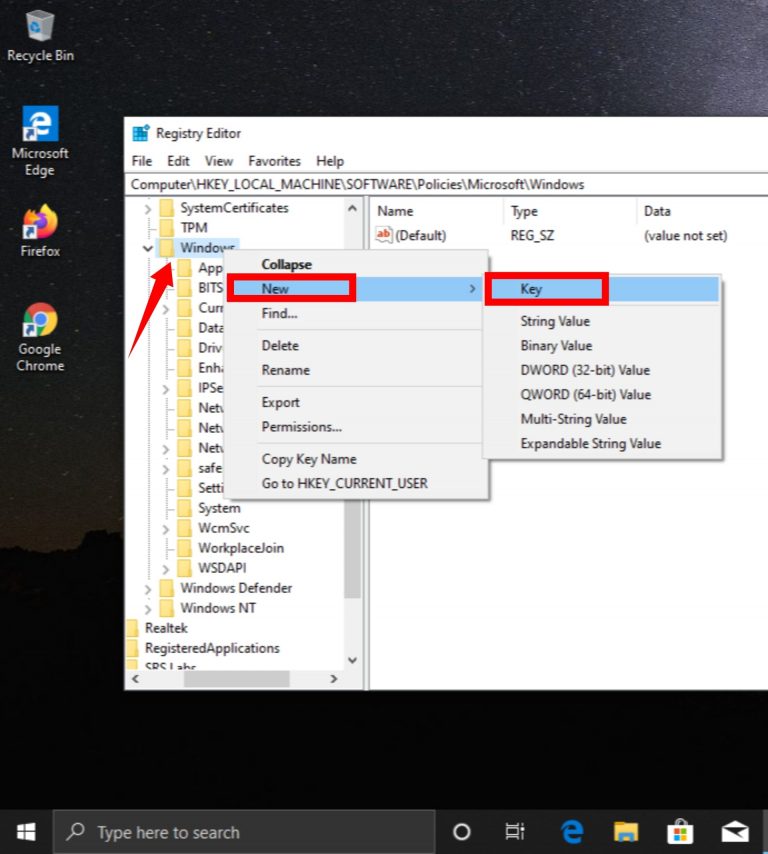
Step 3. Navigate to HKEY_Local_Machine > SOFTWARE > Policies > Microsoft > Windows, then right-click the Windows directory and select New > Key.
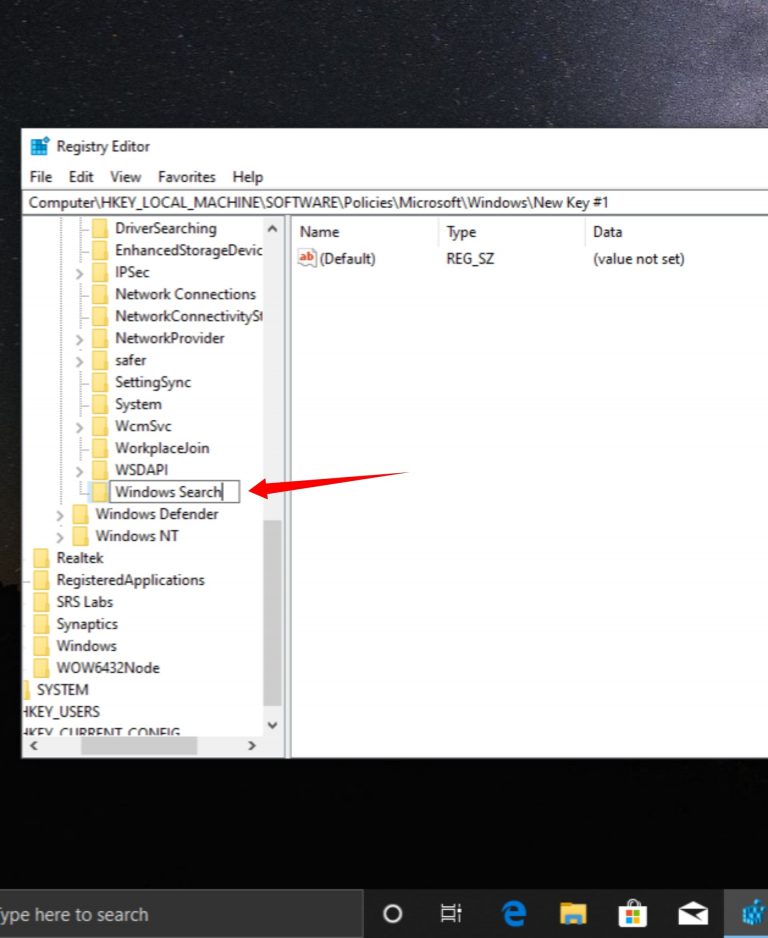
Step 4. Write the name of folder Windows Search.
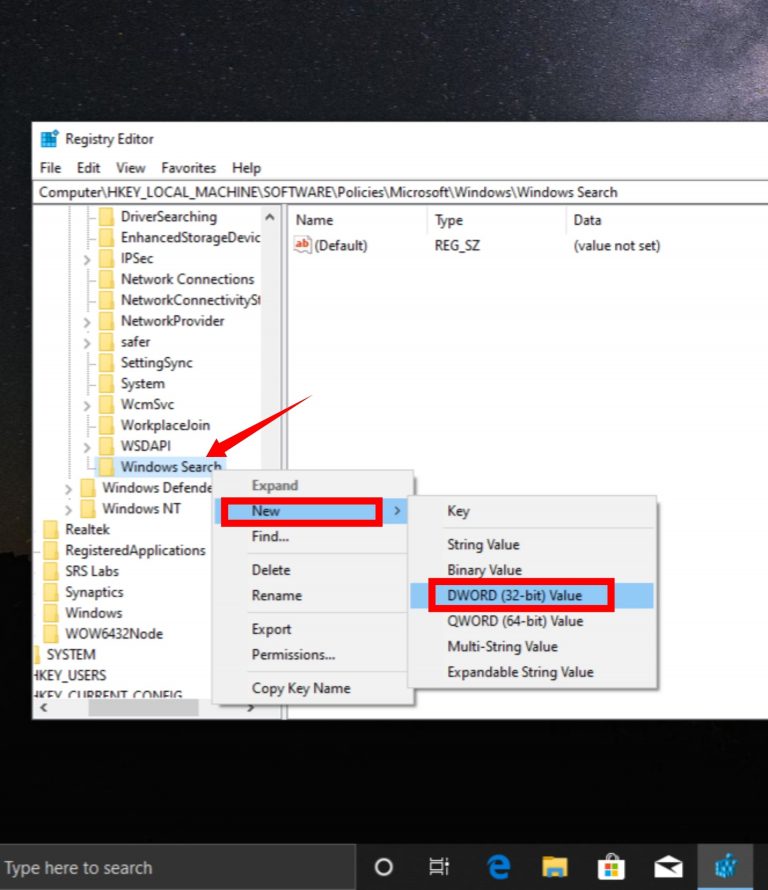
Step 5. Right-click the Windows Search folder and then select New > DWORD (32-bit) Value.
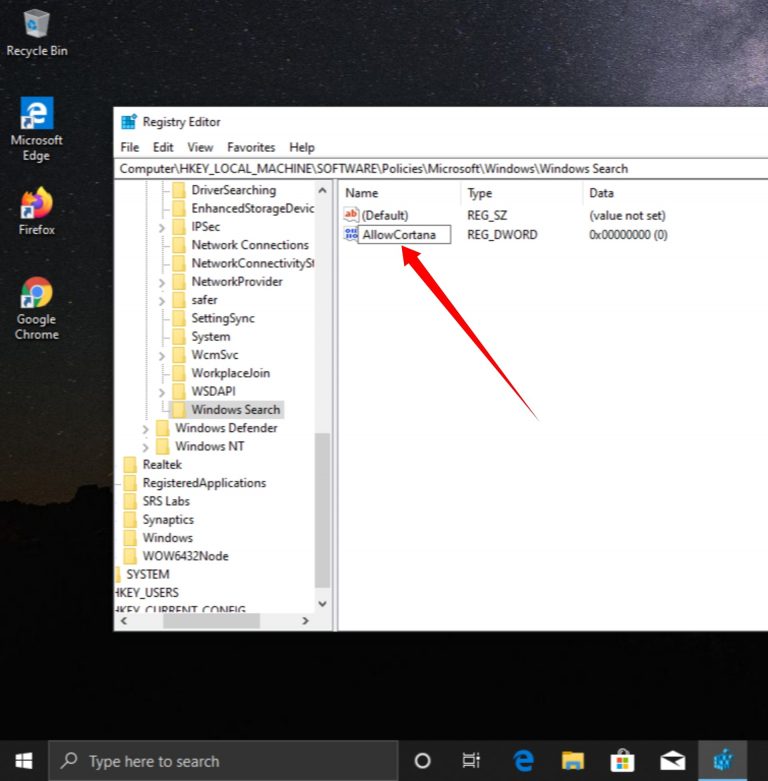
Step 6. Write the name of folder AllowCortana.
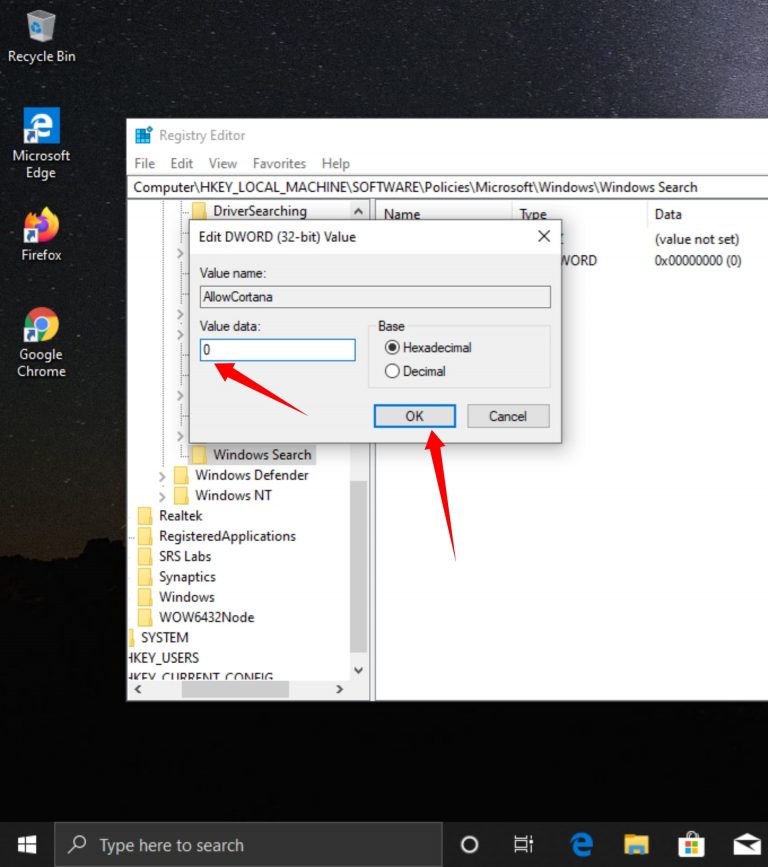
Step 7. Double-click the AllowCortana file to open it, set the value to 0, then select OK.
Step 8. Close the Registry editor and restart your computer.
How to Enable Cortana Back in Windows 10
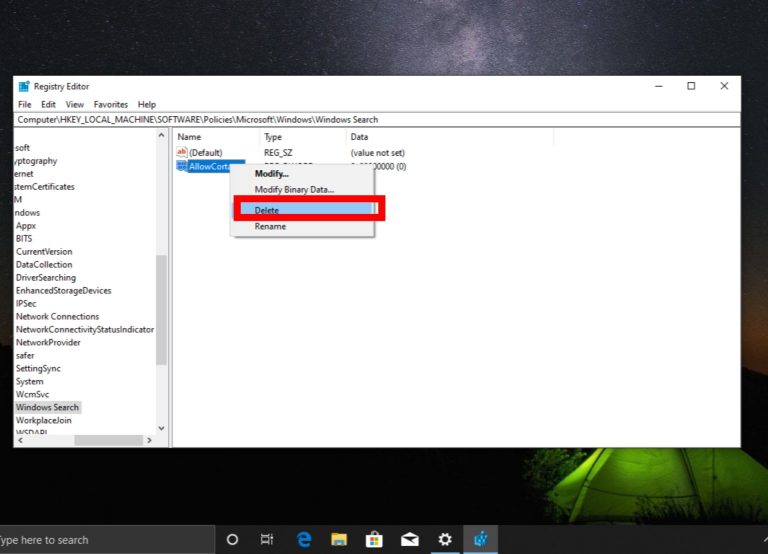
So by now, you have learned how to disable Cortana in Windows 10 Home, Pro and Enterprise via Registry editor but how to enable Cortana back if you’ve changed your mind. The easiest way to enable Cortana is going back into registry Editor and delete the AllowCortana file you created.
Conclusion :
This feature was about how to disable Cortana permanently in Windows 10 Home, Pro, and Enterprise. Registry Editor is the best method to disable Cortana because most Windows 10 versions like Home, Pro and Enterprise has Registry editor.

