Most of the people of kodi addons depend on publicly to be had sources of content material, that is why you can use them free of charge. We’re speaking approximately extraordinary forms of web scrapers, a number of which can be more successful than others. But, there are certain addons that take a totally one-of-a-kind course – and one of these is seren. By using depending simplest on top class-priced sources, handiest you may be sure that you’ll get the movies and television suggests you want, in excessive excellent. So, allow’s talk approximately what to expect from this addon and the way to install the seren kodi addon.
Also, please observe that seren is designed to paintings with real debrid and premiumize, each of which can be premium-priced offerings. However, to apply either of these, you’ll want to allow it within the addon. Don’t fear, we’ll be right here to guide you all the manner thru, so make certain to read this article on this entirety. And now, let’s leap to what you want to realize.

6 Steps to Install Seren on Kodi
Before you do anything else, you need to enable Kodi’s support for unknown sources. This is a very simple procedure, and make sure to use the provided link. And also, we strongly recommend you update your Kodi to the latest version available – Kodi 18 Leia, so you can avoid some common technical problems. And now, here’s how to install Seren on Kodi.
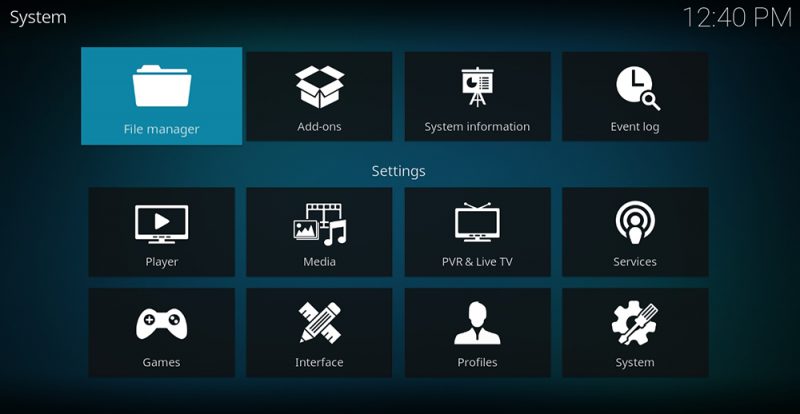
1 : Launch Kodi and click on the cogwheel icon in the top-left corner. This is where you’ll find the application’s settings panel, where you need to click on ‘File Manager’. Finally, take a look at the left side and double-click on ‘Add Source’.
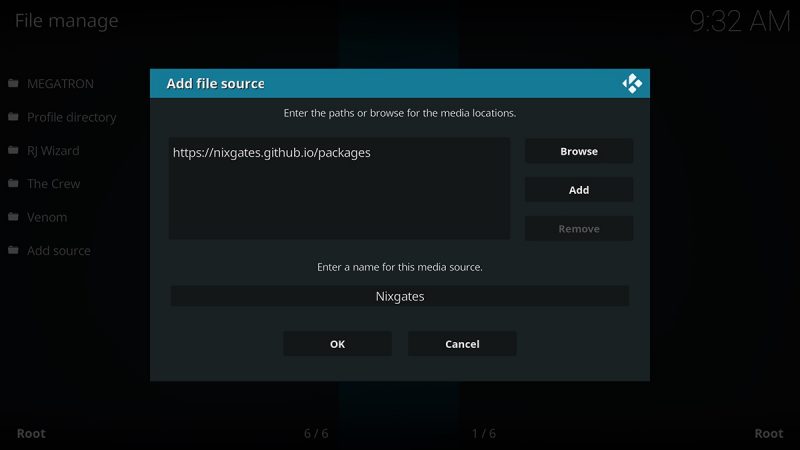
2 : You should see a pop-up on your screen at this moment. Click on ‘<None>’ and then enter the following URL when asked: https://nixgates.github.io/packages. Don’t rush, and take your time to make sure the URL is properly typed in. Then, click ‘OK’. Give a name to your new media source (you can go with Nixgates) and click ‘OK’ to dismiss the pop-up.
3 : Return to Kodi’s start screen. Click on ‘Add-ons’ using the main menu. Then, click on the open box icon (top-left corner) and finally select ‘Install from ZIP file’.
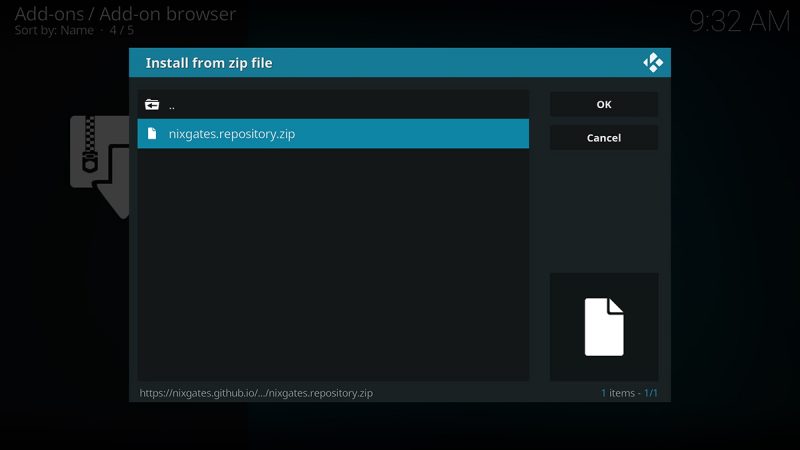
4 : Navigate to Nixgates, which is your newly added media source. This is where you’ll see a ZIP file that’s named ‘nixgates.repository.zip’. Click on the file to install the repo on your Kodi.
5: Then, you need to select ‘Install from Repository’. Navigate to Nixgates Repo > Video Add-ons > Seren. Click on the addon’s name to see its overview.
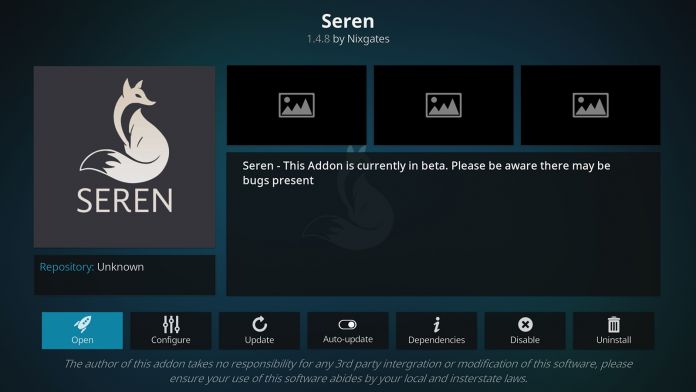
6 : Finally, use the ‘Install’ button to finalize the procedure. If asked to install any dependencies, confirm your decision. Within a few moments, the Seren Kodi addon should be installed and will be waiting for you in your ‘Add-ons’ section.
Fix Seren Errors (Provider Package, Real Debrid & More)
In general, Kodi addons are ready to be used as soon as you install them. However, that’s not the case with Seren. To make the addon search for content, you need to authorize your Real Debrid or Premiumize accounts. In addition, we’ll give you some tips on how to resolve common issues.
How to Set Up Real-Debrid With Seren?
As said earlier, this addon is designed to work with ‘premium links’ through Real-Debrid. So, to use this service with Seren, you first need to configure it within the addon. With this said, we’ll show you how this is done.
1 : Open Seren and then choose ‘Tools’ from its main menu.
2 : Then, select ‘Open Settings Menu’.
3 : On the left-hand side, make sure to select ‘Scraping’. On the right, scroll down until you see a segment called ‘Auto Caching Assistant’. Then, choose ‘Real Debrid’ as the ‘Preferred Cloud Location’.
4 : Now, select ‘Accounts’ from the left-placed menu. On the right, scroll down until you see a group of settings named ‘Real Debrid Account Settings’. There, enable Real Debrid.
5 : Using that same window, scroll all the way down and click on ‘Authorize Real Debrid’. You should now see a pop-up that contains a code. So, visit the following URL using any Web browser (https://real-debrid.com/device) and input the code you’ll see there.
6 : That’s it! Feel free to return to Seren.
Seren Provider Package – Where to Find It?
If you can’t find any playable content even after adding Real Debrid, you need to install a provider package. Let’s show you how this is done.
1 : Open Seren and select ‘Tools’.
2 : Navigate to Provider Tools > Install Provider Package, and then select ‘Web Location’.
3 : Enter the following URL: http://bit.ly/a4kScrapers and click ‘OK’.
4 : You will now see a confirmation dialog box, so click on the ‘Install’ button.
Seren ‘No Playable Sources’ Error – How to Fix It?
Many are not aware that Seren only works with premium sources – as this addon is still in beta. So, unless you have an account that can be used with those sources, you won’t be able to play anything. With this said, there are two possible solutions to this problem.
1 : You need to add a premium account, associated with services like Real-Debrid or Premiumize. We’ve explained how this is done, so make sure to check our guide above.
2 : If you can’t play anything even after having added premium accounts, you need to install a provider package (explained in the previous question).
Seren Not Working? Here Are the Possible Solutions!
Seren works only with services like Premiumize or Real-Debrid. So, unless you have an active subscription to either of these, you won’t be able to find any content. So, make sure to authorize your accounts and try again.
If nothing else helps, we recommend using a VPN solution. That’s because Kodi and Real-Debrid are often throttled by Internet Service Providers.
Conclusion:
That would be all on a way to Installation the seren kodi addon. In case of any technical troubles or additional questions, make sure to drop us a comment below. we’ll do our quality to provide a timely reaction and to help you resolve your trouble.